How to Make a Bowl with Your Router - No Lathe!
If you've ever wanted to try make a bowl but don't have access to a lathe, fear not! With just a router and some basic materials, you can create beautiful, handmade bowls right in your own workshop.
In this comprehensive guide, we'll walk you through everything you need to know - from the best types of wood to use, to the step-by-step process of creating a bowl shape with a router. Plus, we'll share some tips and tricks for success, as well as important safety precautions to keep in mind.
So grab your tools and let's get started on your bowl making adventure!
What is a Router and How Does it Work?
A router in woodworking is a versatile tool used for hollowing out, shaping, and cutting wood. It operates by spinning a cutting bit at high speeds to remove material, allowing for intricate designs and precise cuts.
Routers come in various types, including plunge routers and fixed-base routers, each serving specific functions.
When using a router, it is crucial to always wear appropriate safety gear such as goggles and hearing protection. Maintaining a firm grip on the tool and moving it against the wood's grain can help prevent kickback and ensure a smooth operation.
By adjusting the depth and speed settings of the router, woodworkers can achieve different finishes and shapes, making it a fundamental tool in woodworking projects.
What Materials Do You Need for Bowl Making with a Router?
To create a bowl using a router, you will need a suitable wood material, router bowl templates, design ideas for bowl shaping, and woodworking tools for carving and finishing.
When selecting wood for bowl making, it is crucial to choose a dense and stable species like maple, cherry, or walnut that can withstand the shaping process.
In terms of design elements, consider incorporating unique patterns or textures for an aesthetic appeal.
Utilizing router bowl templates can aid in achieving consistent and precise shapes, whether for traditional round bowls or more intricate designs.
Essential tools for bowl carving include a bowl carving gouge, rotary tool, sandpaper, and finishing oils or waxes to enhance the natural beauty of the wood.
What Types of Wood are Best for Bowl Making?
When considering the best wood for bowl making with a router, hardwoods such as maple, cherry, walnut, and oak are popular choices due to their durability, grain patterns, and ease of carving.
These hardwoods are known for their strength and resistance to wear and tear, making them ideal for crafting durable and long-lasting bowls. Maple, with its fine and consistent grain, offers a smooth surface for intricate designs. Cherry, on the other hand, boasts a warm reddish-brown hue that deepens over time, adding richness to the finished bowl. Walnut's dark, lustrous appearance brings a touch of elegance, while oak's prominent grain provides a rustic charm that enhances the overall aesthetic of the bowl.
What Other Tools are Needed for Bowl Making with a Router?
In addition to a router, other essential tools for bowl making include bowl turning guides, sanding equipment for finishing touches, safety gear to ensure protection, and woodworking supplies for a seamless crafting process.
One crucial aspect to consider when using a router for bowl making is investing in high-quality safety gear, such as safety goggles, ear protection, and a dust mask to protect yourself from potential hazards.
When it comes to sanding techniques, using a combination of hand sanding and power sanding tools can help achieve a smooth and polished finish on the bowl.
Utilizing a bowl turning guide can aid in maintaining precision and control while shaping the wood with the router, ensuring optimal results in your woodworking projects.
Step-by-Step Guide to Make a Bowl with a Router
- Creating a bowl with a router involves precise steps such as preparing the wood, setting up the router, shaping the bowl, and finally sanding and finishing it to perfection.
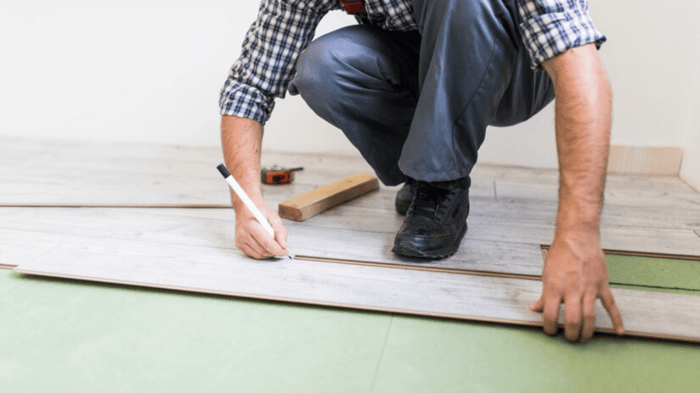
To start, select a suitable piece of wood for your bowl, making sure it is free from any defects or imperfections that could affect the final product.
Once you have your piece of wood, mark the center point and use a compass to draw the desired size and shape of the bowl.
Next, secure the wood firmly in place on a workbench, ensuring it doesn't move during the routing process.
Proceed by attaching the appropriate router bit, typically a bowl-cutting bit, to your router, adjusting the cutting depth according to the thickness of the bowl you want to achieve.
Step 1: Prepare the Wood
- The initial step in making a bowl with a router is to select a suitable wood blank, mark the bowl's dimensions, secure the wood piece, and prepare it for the shaping process.
Once the wood blank is chosen, it is crucial to ensure that it is free from defects like knots or cracks that could compromise the bowl's structural integrity.
Prior to using the router, the wood blank should be properly dried to prevent warping or cracking during the carving process.
It is recommended to wear appropriate safety gear such as goggles and a dust mask to protect your eyes and respiratory system from wood particles and dust generated while shaping the bowl. Taking these precautions will help create a safe and efficient woodworking environment for crafting a beautiful and durable bowl.
Step 2: Set Up the Router
Once the wood is ready, the next step involves setting up the router with the appropriate bit, adjusting the speed settings, and securing the workpiece in place for precise carving and shaping.
It is crucial to select the right router bit for bowl making, typically a bowl cutting bit or a core box bit which offer efficient shaping capabilities.
When setting the router speed, it's recommended to start at a lower speed and gradually increase it to prevent tear-out and ensure smooth cuts.
Consider the workshop environment by ensuring proper ventilation and lighting to enhance visibility during the routing process and maintain a safe working environment.
Step 3: Create the Bowl Shape
Using the router and a predefined bowl template as a guide, carefully sculpt the wood to create the desired shape and depth of the bowl, ensuring smooth and precise cuts.
This method allows for greater control over the shaping process, as the router's precision enables you to achieve consistent curves and angles. When carving the bowl, pay attention to the grain direction of the wood to prevent tear-out and maintain a clean finish. Experimenting with different router bits can also add a unique touch to your design, whether creating intricate patterns or smooth, flowing edges. Taking your time and gradually removing material will help you achieve a professional-looking bowl with a polished surface.
Step 4: Sand and Finish the Bowl
After shaping the bowl, proceed to sand the surface using fine grits to achieve a smooth finish, then apply a suitable finish to enhance the wood's natural beauty and durability.
To ensure safety during the final steps of sanding and finishing, remember to wear protective gear like safety glasses and a dust mask to shield yourself from debris. When sanding, move the tool in the direction of the wood grain, taking care to avoid applying excessive pressure. Utilize various grit levels progressively, starting from coarser to finer grits for optimal smoothness. Experiment with different finishing techniques such as staining, oiling, or waxing to bring out unique patterns and colors in the wood, adding a personal touch to your bowl creation.
Tips and Tricks for Successful Bowl Making with a Router
- To enhance your bowl making skills with a router, consider tips such as adjusting router speeds, using sharp bits, practicing on scrap wood, and experimenting with different bowl designs.
Focusing on developing your carving techniques can significantly impact the quality of your bowl creations. Pay close attention to grain direction when shaping the wood, as this can influence the final aesthetic appeal of the bowl.
Honing your skills with the router is crucial; understanding how to control the tool effectively and safely is key. As you progress, challenge yourself by attempting more intricate designs to push your creativity and skill level.
Embrace the process of experiential learning, as each bowl you create offers valuable lessons that contribute to your growth as a woodworking artisan.
How to Avoid Tearout
One of the key challenges in bowl making with a router is minimizing tearout, which can be prevented by using sharp bits, cutting with the grain, and securing the wood properly during routing.
Utilizing patterns can significantly help in reducing tearout. Patterns provide a guide for the router, ensuring precise and controlled cuts, ultimately leading to smoother surfaces.
When using patterns, it is important to secure them firmly to the workpiece to avoid any movement that may cause tearout. Safety precautions such as wearing protective gear, maintaining a steady hand, and avoiding excessive force on the router can also contribute to a more successful and tearout-free routing process.
Investing in high-quality router bits and materials can improve the overall cutting performance and minimize tearout risk.
How to Achieve Smooth Curves
Creating smooth curves in a bowl with a router requires consistent hand movements, high-quality carving supplies, and mastering the router's maneuverability to achieve precision and artistic curvature.
- Specialized supplies play a crucial role in enhancing the smoothness of the curves. Using a sharp curved router bit designed for bowl carving can greatly assist in achieving desired contours.
- Developing a keen eye for detail and tactile sensitivity through consistent practice can lead to the mastery of carving skills. By gradually refining techniques and experimenting with different depths and angles, artisans can elevate their craft to create bowls with exquisite curves that showcase their artistic finesse.
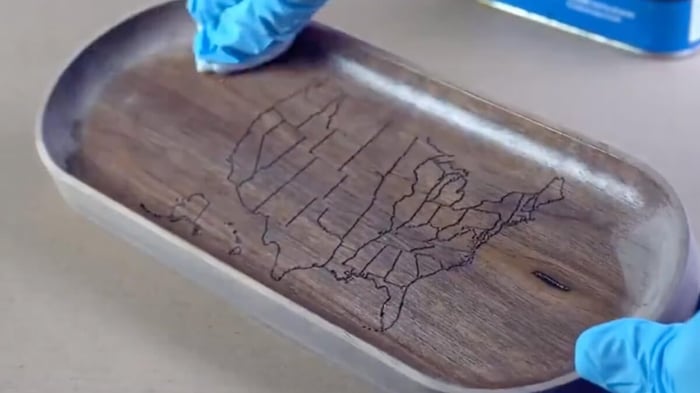
How to Create Unique Designs
For crafting distinctive bowls with a router, explore innovative designs, experiment with various bowl patterns, and engage in sculpting techniques to infuse artistic flair and personal artistry into your bowl creations.
Infusing your bowl creations with unique patterns can truly elevate your design to a whole new level, making them stand out as one-of-a-kind pieces. By experimenting with different sculpting methods, you can add texture and depth to your bowls, enhancing their visual appeal.
Embracing a mindset of creative exploration allows you to push the boundaries of traditional bowl design, giving you the freedom to express your artistic vision in a tangible form. This approach fosters an environment where innovation flourishes, propelling your bowl-making journey to new heights of design excellence.
Safety Precautions for Bowl Making with a Router
Prioritize safety when making bowls with a router by wearing appropriate safety gear, securing workpieces firmly, using sharp tools, and following safety guidelines to prevent accidents and injuries.
When working with a router for bowl making, it is crucial to ensure that the workspace is well-lit and clutter-free to avoid tripping hazards. Always maintain a steady stance and focus on the task at hand to prevent distractions that can lead to mistakes. Always keep the router unplugged when changing bits or making adjustments to avoid accidental activation. Remember, safety should always be the top priority in any woodworking project to ensure a pleasant and successful woodworking experience.
Frequently Asked Questions
1. Can I make a bowl with a router instead of a lathe?
Yes, you can make a bowl with a router without using a lathe. This method is known as the router bowl technique and it is a great alternative for those who do not have access to a lathe.
2. What materials do I need to make a bowl with a router?
To make a bowl with a router, you will need a router, a bowl template, a router bowl bit, a plunge router attachment, a workbench or table, clamps, and safety gear such as goggles and gloves.
3. How do I choose the right router bowl bit for my project?
The type of bowl bit you will need depends on the size and depth of the bowl you want to make. A 1/2 inch or 3/4 inch bowl bit is recommended for most projects. Make sure to also choose a bit with a bearing on the bottom to guide the router along the bowl template.
4. What is a bowl template and how do I make one?
A bowl template is a guide that helps you create a symmetrical bowl shape. You can make one by tracing the desired bowl shape onto a piece of MDF or plywood and cutting it out with a jigsaw. Make sure the template is smooth and free of any bumps or imperfections.
5. Can I use any type of wood for making a bowl with a router?
It is recommended to use a dense and durable wood such as maple, birch, or cherry for making a router bowl. Avoid using soft or porous woods that may not hold up well to the routing process. You can also experiment with different wood types to achieve unique designs.
6. Is the router bowl technique suitable for beginners?
While some experience with a router is recommended, the router bowl technique can be done by beginners as long as proper safety precautions are taken. It is important to carefully follow the instructions and take your time to avoid any accidents. Practice on scrap wood before attempting to make a bowl with your desired wood.