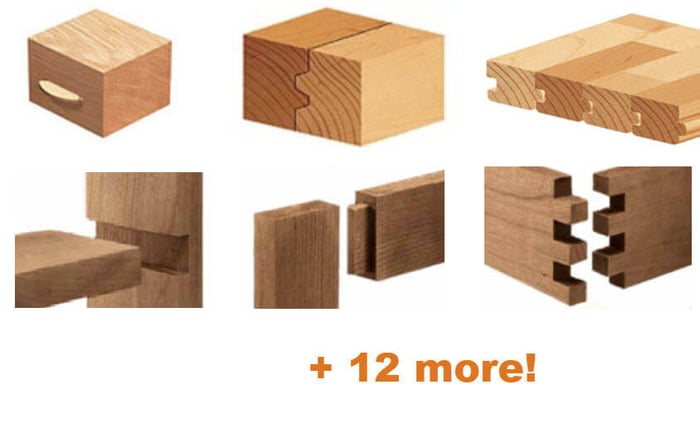
18 Types of Woodworking Joints
You can’t work with wood without putting two pieces together. (Unless you’re a sculptor, that is!) Joinery is one of the most fundamental elements of woodworking. Here’s a list of our favorite woodworking joints, from the easiest to some of the most detailed and strongest joints in the craft.
Butt Joint
The simplest joint to make but weak. Requires very clean cuts. Generally glued and reinforced with nails, dowels or biscuits, or (in construction) other hardware. See our video, “Clean Cuts w/ General Purpose Saw Blade”, and our selection of wood glue.
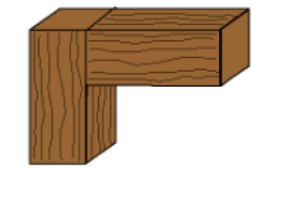
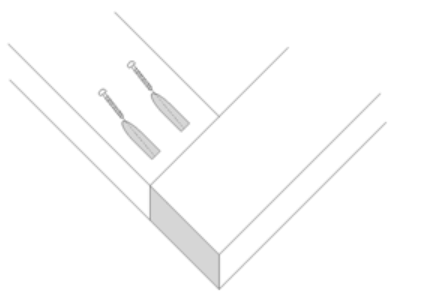
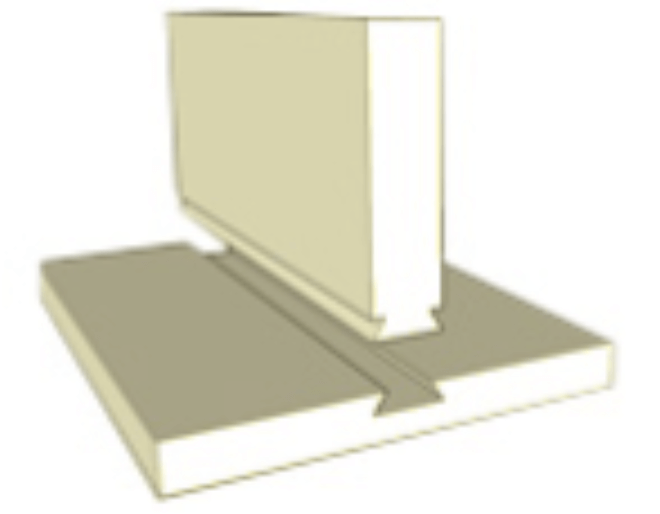
Miter Joint
Type of butt joint, where the ends of the wood meet at 45-degree angle. No stronger, but more attractive than a plain butt joint, with no visible end grain. Can be strengthened with "fingers" creating a lock-miter joint (as pictured). Easily made with ToolsToday Router Bits.
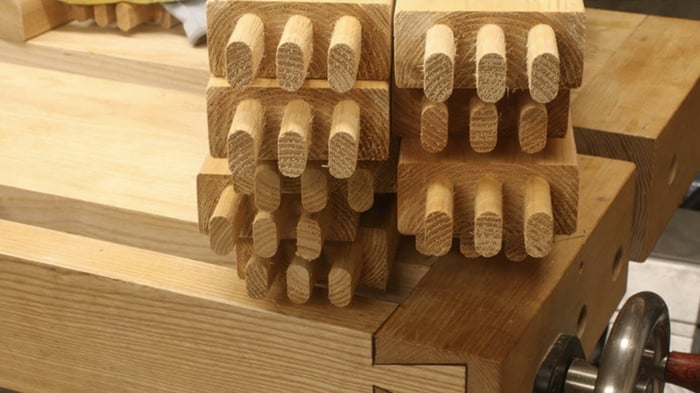
Dowel Joint
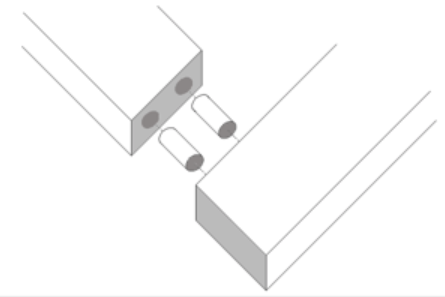
Easy to make. Corresponding holes are drilled into two pieces of wood and a dowel is glued in place to connect them. Dowels can also secure and strengthen other types of woodworking joints. For finest results, cover dowels with wood plugs. See our article about making plug cutters.
Biscuit Joint
Crescent-shaped slots are carved into 2 pieces of wood, then an oval-shaped "biscuit" is glued into place to join them both. Keeps glued boards aligned while glue dries and strengthens the bond. Cut perfect biscuit slots with our Biscuit Jointers.
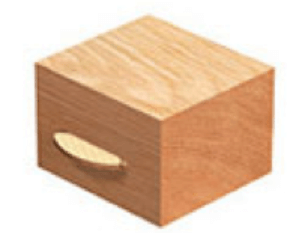
Pocket-Hole Joint
Simple to make and often seen on manufactured items as it is easy to reproduce using a jig. (Kreg® Pocket-Hole Jigs can be found in any hardware store.) Drill holes at an angle to both pieces for a stronger joint. For very best results, use a Forstner bit, which are well known for their ability to drill clean and chip-free holes in wood.
Lap Joint or Halving Joint
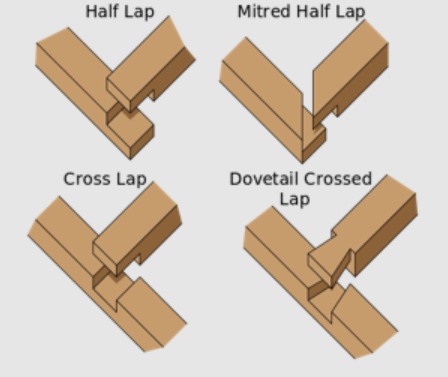
There are many versions of the lap joint but they all involve removing half of the wood from each piece using a saw, chisel, or router. 1/2 of the wood material on both pieces is removed, weakening the joint somewhat, but the two boards are aligned flush and stable.
Edge Joint
Used to connect 2 boards along their length. Edge joints are usually glued, and are made stronger with complementary interlocking protrusions. The profile expands the edge-to-edge glue surface, but more importantly, produces the precise surface alignment that’s essential for fast glueups.
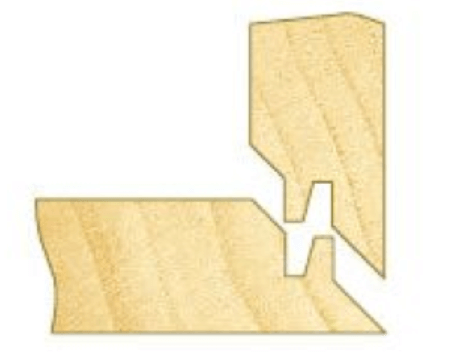
Tongue and Groove
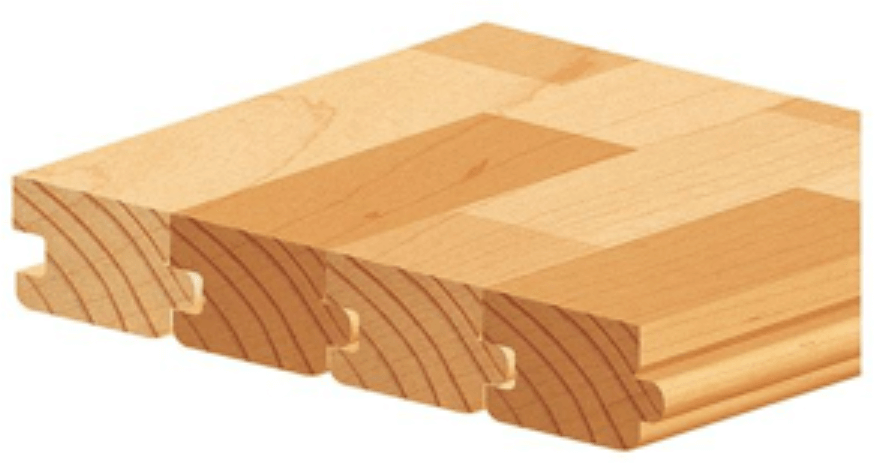
A type of edge joint commonly used for wood floors, or for paneling. See our article “Make Your Own Tongue and Groove Hardwood Floor Panels.”
Tambour
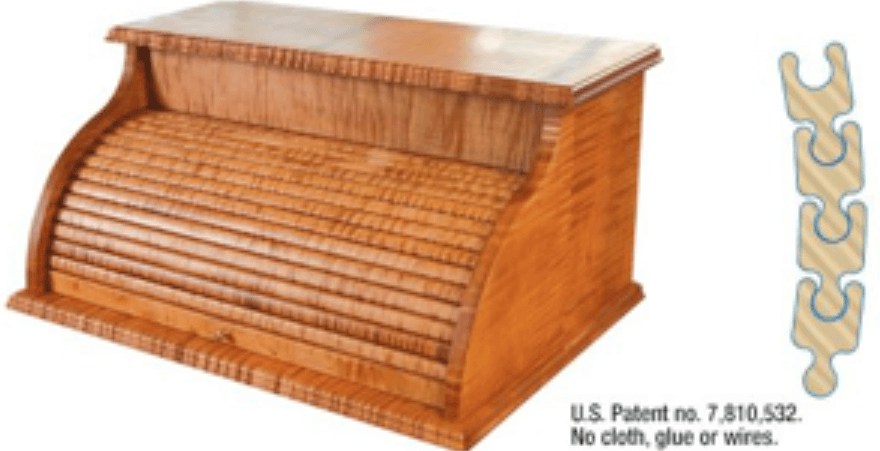
Often make by gluing slats to canvas, ToolsToday's unique, patented 3-piece router bit set creates tambours without the need for wires, canvas or glue; with a unique tongue-and-groove design which shapes interlocking slats. Assembly is easy! Step by step guide in the post "Tambour Door Router Bit Set."
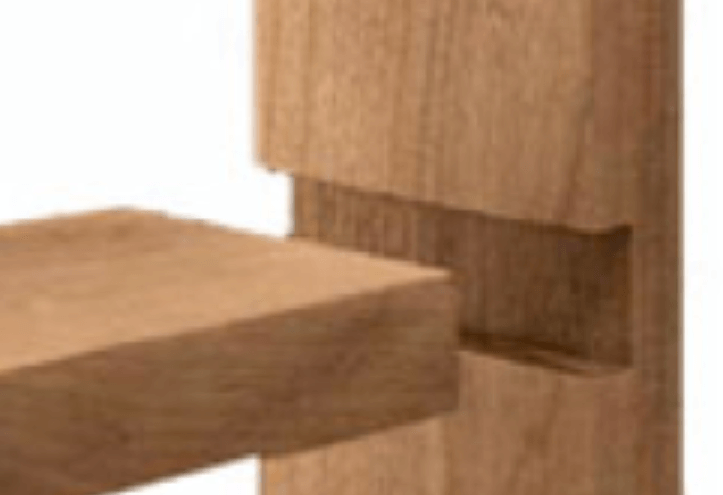
Rabbet Joint
A rabbet is a recess or groove cut into the edge of a piece of machinable material, usually wood. When viewed in cross-section, a rabbet is two-sided and open to the edge or end of the surface into which it is cut.
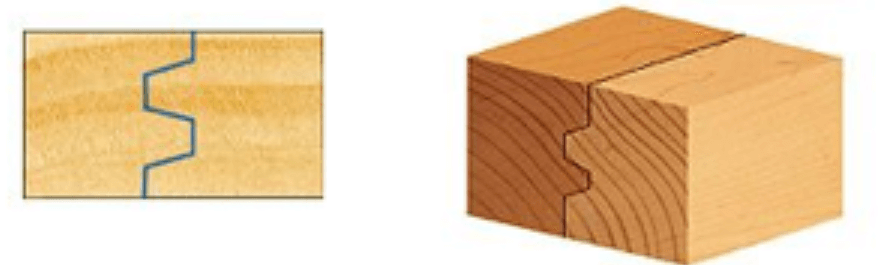
Dado Joint
A slot or trench cut into the surface of a piece of wood. When viewed in cross-section, a dado has three sides. A dado is cut across, or perpendicular to, the grain and is thus differentiated from a groove which is cut with, or parallel to, the grain. Works very well in MDF. Learn more about dado saw blades.
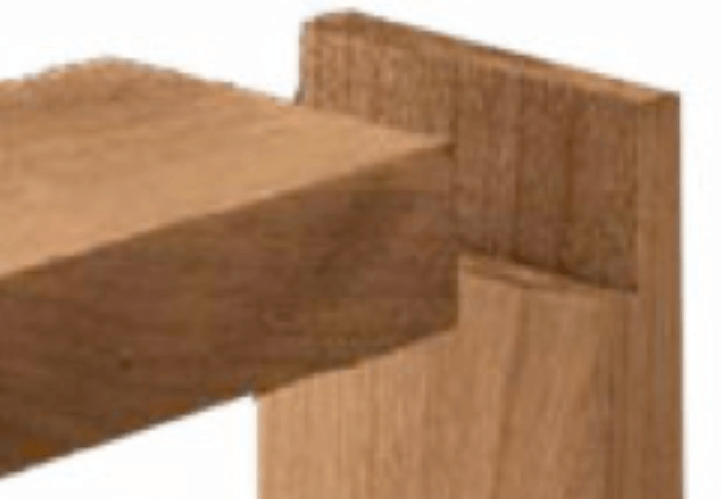
Mortise and Tenon Joint
The tenon, formed on the end of a member generally referred to as a rail, is inserted into a square or rectangular hole (the mortise) cut into the corresponding member. The tenon is cut to fit the mortise hole exactly and usually has shoulders that seat when the joint fully enters the mortise hole.
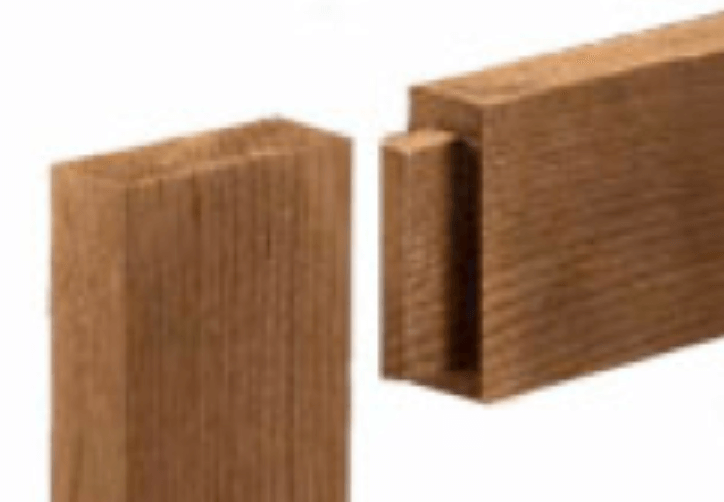
Bridle Joint

Like Mortise and Tenon, but easier to make as it is open on three ends.
Finger Joint (a.k.a. Comb Joint)
A woodworking joint made by cutting a set of complementary rectangular cuts in two pieces of wood, which are then glued. To visualize a finger joint simply interlock the fingers of your hands at a ninety degree angle; hence the name "finger joint." It is stronger than a butt or lap joint, and often forms part of the overall look of the piece. For more information see Dado Saw Blades.
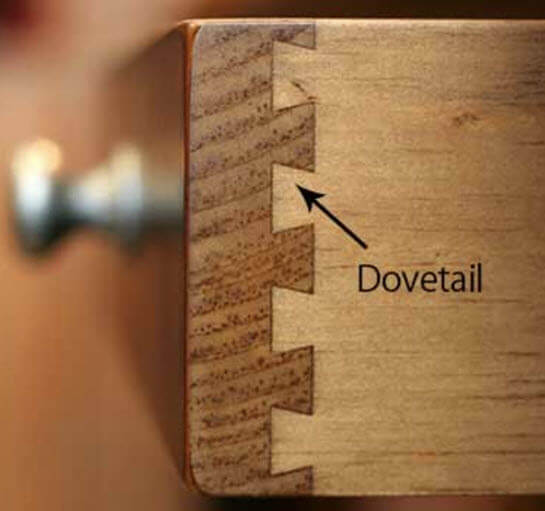
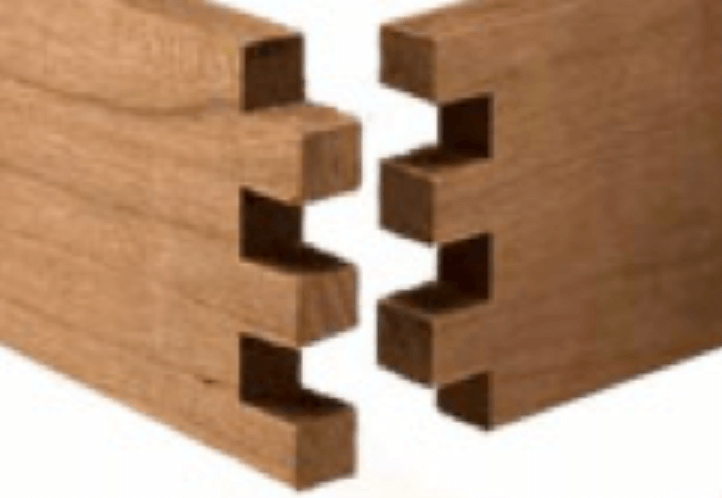
Through Dovetail
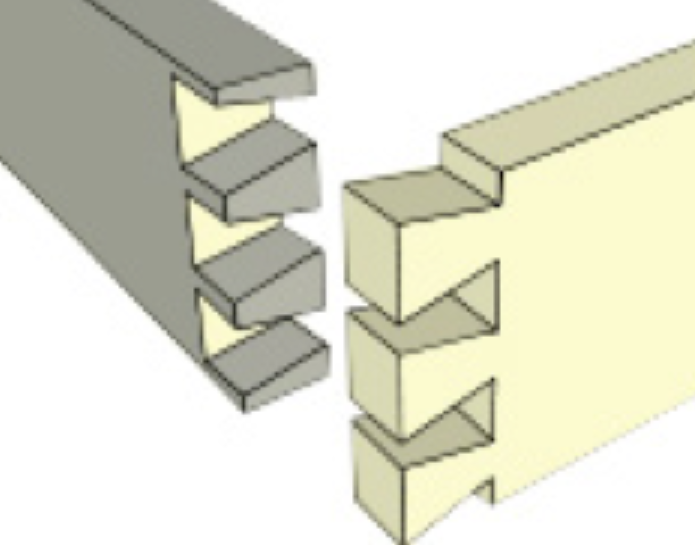
The most basic method of creating a dovetail is called a through dovetail. Here, two pieces of wood are joined together at their ends with a finger-like interlocking method which is seen from all outside surfaces. This method is used in everyday practice for joining the corners of frames, boxes, cabinets, and other items. Read more about dovetail joints.
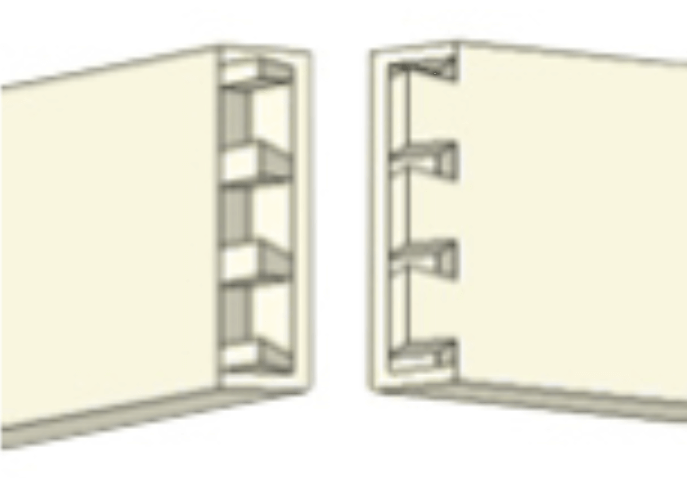
Half-Blind Dovetail
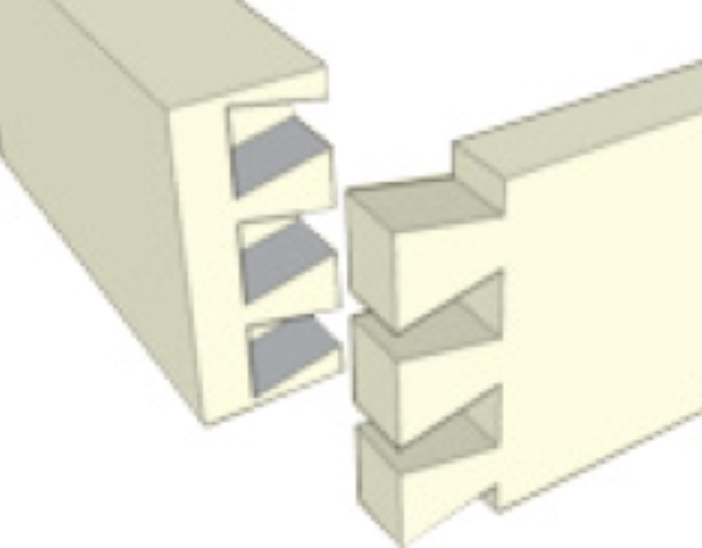
A half-blind dovetail enables the woodworker to hide the joint from the front end. The tails are housed in sockets in the ends of the board that is to be the front of the item so that their ends cannot be seen. Half-blind dovetails are commonly used to fasten drawer fronts to drawer sides. This is an alternative to the practice of attaching false fronts to drawers constructed using through dovetails.
Secret Dovetail (a.k.a. Mitered Blind Dovetail)
These woodworking joints are used in the highest class of cabinet and box work. It offers the strength found in the dovetail joint but is totally hidden from both the inside and outside corners by forming the outer edge to meet at a 45-degree angle while hiding the dovetails internally within the joint.
The mitered corner dovetail joint is very similar in design, but it has just a single dovetail and is used for picture frames and other similar joins.
Sliding Dovetail
A method of joining two boards at right angles, where the intersection occurs within the field of one of the boards that is not at the end. This joint provides the interlocking strength of a dovetail. Sliding dovetails are assembled by sliding the tail into the socket. It is common to slightly taper the socket, making it slightly tighter towards the rear of the joint, so that the two components can be slid together easily but the joint becomes tighter as the finished position is reached. For more information see Dovetail Joints and Their Uses.