![]()
How to Nest in Vectric VCarve: A Step-by-Step Workflow
Table of Contents
Wood prices aren't getting any cheaper. If you're manually dragging vectors around your sheet, rotating parts by eye, and trying to squeeze “just one more” component onto the board, you're probably wasting more material than you realize.
That’s where the built-in nesting tools inside Vectric VCarve come in.
Efficient CNC nesting helps you maximize every square inch of plywood, MDF, plastic, or composite material while speeding up production and reducing mistakes. Whether you're batch-cutting cabinet parts, signs, drawer components, templates, or production runs, a proper nesting workflow can dramatically improve efficiency.
Better yet, nesting isn't just about saving material. Done correctly, it also helps prevent tool collisions, improves vacuum hold-down performance, and creates cleaner, safer cuts.
In this guide, we'll walk through the complete workflow for nesting parts in VCarve — from setup to toolpathing — along with some real-world production tips that can save you time, material, and broken bits.
Pre-Nesting Checklist: What to Do Before You Click the Button
Before letting VCarve automatically arrange your parts, you need to give the software accurate information. Nesting is only as good as the setup behind it.
Measure Your Material Accurately
Never assume your plywood or MDF is exactly the thickness printed on the label.
A “3/4 inch” sheet is rarely a true 0.750". Cabinet-grade plywood, MDF, melamine, and veneered panels can vary significantly depending on manufacturer and moisture conditions.
Use calipers to measure:
- X dimension: Actual sheet width
- Y dimension: Actual sheet length
- Z dimension: True material thickness
This matters because your cutting depths, onion skin thickness, and toolpath calculations all depend on accurate material sizing.
Even being off by 0.02" can create problems during nested production runs.
 Take your woodworking to the next level with the Carbide-3D Crush-It Essential Clamp Set
Create a “Clamp Zone” Buffer
Most midsize CNC machines use:
- T-track clamps
- Cam clamps
- Vacuum pods
- Hybrid hold-down systems
You do not want VCarve nesting parts directly over your hold-down hardware.
Before nesting, define safe margins around the outside of the sheet. This creates a dedicated “clamp zone” that keeps the cutter safely away from physical fixtures.
Even shops with vacuum tables often leave a small perimeter buffer to avoid imperfect factory edges or warped corners.
A good starting point is:
- 0.5" to 1" border on all sides for vacuum tables
- 2"+ clearance for physical clamp systems
Group Your Vectors Properly
This is one of the biggest beginner mistakes in VCarve nesting.
If your internal holes, slots, dados, and outer profile vectors are not grouped together, VCarve may scatter them independently across the sheet during nesting.
That means:
- One cabinet side here
- Its screw holes over there
- The profile vector somewhere else entirely
Before nesting:
- Select all vectors belonging to a single part
- Group them together
- Repeat for every individual component
This ensures each part nests as a complete unit.
 VCarve Master Training Course Unlock the full potential of your CNC machine with the ultimate guide to mastering 2D design and toolpath creation. Whether you’re a complete beginner or an intermediate user, this course is designed to eliminate frustration and provide you with a clear, structured path to success.
The Step-by-Step VCarve Nesting Workflow
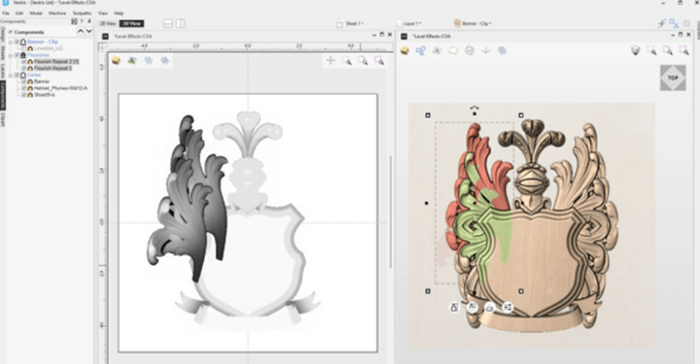
Step 1: Access the Nesting Tool
Inside VCarve, select the vectors you want to arrange.
Then navigate to:
Edit Objects → Nest Selected Vectors
This opens the nesting dialog where you'll define spacing, rotation permissions, borders, and sheet handling.
Step 2: Define Tool Diameter & Clearance
This step matters far more than most beginners realize.
Your nested spacing must account for:
- The actual cutter diameter
- Tool deflection
- Machine accuracy
- Material movement
- Safe chip evacuation
For example, if you're using an Amana Tool 1/4" Spektra™ Compression Bit, your spacing should generally exceed the cutter diameter itself.
A common production-safe rule is:
:contentReference[oaicite:1]{index=1}
Where:
- D = tool diameter
- C = minimum clearance
So with a 1/4" bit:
- Tool Diameter = 0.25"
- Recommended Clearance ≈ 0.50"
Can you nest tighter than that? Sometimes.
But tighter nesting reduces chip evacuation space and increases the risk of heat buildup, recutting chips, broken tools, or small-part instability during cutting.
For production cutting, slightly wider spacing is usually worth the added reliability.
Step 3: Set the Edge Border Gap
Factory sheet edges are not always perfect.
Plywood can arrive with:
- Minor warping
- Damaged corners
- Voids
- Delamination
- Out-of-square edges
Leaving an edge border gap helps avoid these imperfections and creates safer hold-down conditions near the perimeter.
Typical production border gaps:
- 0.25"–0.5" for precision sheet goods
- 0.75"+ for lower-grade plywood or warped material
Step 4: Decide on Part Rotation Rules
This is where material knowledge becomes important.
Materials That Usually Allow Free Rotation
- MDF
- HDPE
- Acrylic
- PVC
- Foam board
- Many plastics
With these materials, allowing 45° or 90° rotation often improves sheet utilization dramatically.
Materials That Usually Require Grain Alignment
- Hardwood plywood
- Veneered plywood
- Solid hardwood panels
- Decorative laminates
For these materials, unrestricted rotation can create mismatched grain direction between adjacent parts.
That may be unacceptable for:
- Cabinet doors
- Furniture components
- Drawer fronts
- Architectural millwork
In those cases, restrict rotation during nesting to preserve visual grain consistency.
Step 5: Preview Multi-Sheet Outputs
If your parts exceed the available space on one sheet, VCarve automatically creates additional sheets:
- Sheet 1
- Sheet 2
- Sheet 3
- Etc.
This makes production management much easier for larger jobs.
Always review every generated sheet before toolpathing.
Things to check:
- Unexpected rotated parts
- Tiny unusable scrap zones
- Overly tight clearances
- Parts too close to clamps
- Potential hold-down issues
 FREE MDF Simulated Shaker Style Cabinet Door CNC Plans, Downloadable and Customizable Includes step-by-step instructions, SVG files, DXF Files, Vectric Aspire and Vectric V-Carve Pro files, both compatible with version 9 and up. The Vectric files include all toolpaths set for you.
 Toolpathing Your Nested Parts: The Real “Gotchas”
Nesting the vectors is only half the job.
Cutting them safely is where most beginner problems happen.
The Danger of Small Nested Parts
Once a part is fully cut free from the surrounding skeleton, it can move unexpectedly.
That movement may come from:
- Dust boot suction
- Spindle rotational force
- Vibration
- Vacuum pressure loss
- Chip buildup
When a loose part shifts into the cutter, the result can be:
- Broken bits
- Ruined parts
- Lost zero position
- Damaged spoilboards
- Flying projectiles
Use Tabs or an Onion Skin Strategy
To keep parts stable during cutting, most CNC operators use:
- Tabs
- Onion skinning
- Or both together
Tabs
Tabs leave tiny uncut bridges connecting the part to the surrounding material.
Advantages:
- Very secure hold-down
- Simple to set up
- Reliable for small parts
Disadvantages:
- Requires cleanup sanding or trimming afterward
Onion Skinning
Onion skinning leaves a thin layer of material at the bottom of the cut.
Advantages:
- Cleaner finished edges
- Excellent for vacuum tables
- Faster post-processing
Disadvantages:
- Requires accurate material thickness measurement
- Can fail if material varies too much
Many production shops combine both methods for maximum reliability.
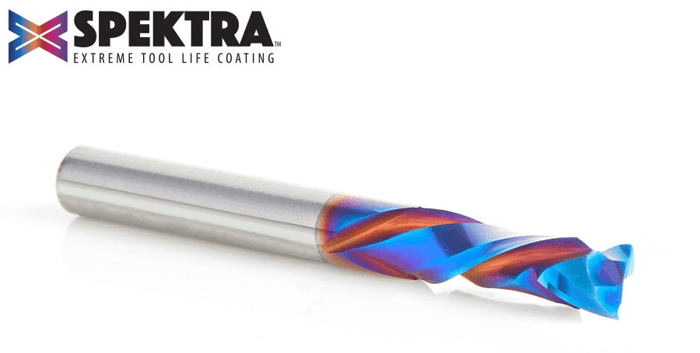
Why Compression Bits Matter for Nested Cutting
For plywood, melamine, veneered MDF, and laminated materials, a compression bit is often the best choice.
Here’s why:
- Up-cut bits pull chips upward but can tear the top veneer
- Down-cut bits protect the top surface but force chips downward into narrow channels
- Compression bits shear both top and bottom edges cleanly
This becomes especially important during nested cutting where parts are tightly spaced and chip evacuation is more difficult.
An Amana Tool Spektra™ Compression Bit helps:
- Reduce tearout
- Improve edge quality
- Maintain cleaner laminates
- Reduce recutting chips
- Improve production consistency
That’s why compression bits are standard equipment in many cabinet, signmaking, and production CNC shops.
Conclusion: Nesting Is a Production Multiplier
Efficient nesting transforms your CNC workflow.
Instead of manually arranging parts and wasting expensive material, VCarve’s nesting tools help you:
- Maximize sheet utilization
- Reduce scrap
- Speed up production
- Improve consistency
- Protect tooling
- Create safer cutting operations
For many midsize CNC shops, proper nesting can make a machine feel dramatically more productive without upgrading equipment.
Ready to put your nesting skills to the test?
Check out our premium selection of Amana Tool CNC Compression Bits and download fully optimized, nested-ready CNC Project Plans directly from the ToolsToday store to start carving smarter today.
FAQs
What is nesting in Vectric VCarve?
Nesting is the process of automatically arranging parts on a sheet of material to maximize usable space and reduce waste. VCarve’s nesting tool helps optimize layouts for CNC cutting by organizing vectors efficiently across one or multiple sheets.
Why do my vectors scatter across the sheet when nesting?
This usually happens because the vectors were not grouped together before nesting. Internal holes, slots, and outside profiles for each part should be grouped so VCarve treats them as a single component.
How much clearance should I leave between nested parts?
A common starting point is roughly 2× the cutter diameter. For example, a 1/4" CNC router bit often works best with about 1/2" spacing to improve chip evacuation and reduce the risk of tool collisions or overheating.
Should I allow part rotation during nesting?
It depends on the material. MDF, plastics, and acrylics can usually rotate freely for better material usage. Hardwood plywood and veneered panels often require restricted rotation to preserve consistent grain direction.
Why are compression bits recommended for nested CNC cutting?
Compression bits cut both the top and bottom edges cleanly, helping reduce tearout in plywood, melamine, and laminated materials. They’re especially useful for nested cutting because the tight spacing between parts can make chip evacuation more difficult.