CNC Wood Carving for Beginners: Bits, Setup, and Your First Project
Table of Contents
- Quick Take: Getting Started with CNC Wood Carving
- What Is CNC Wood Carving?
- Your First CNC Project: A V-Carved Wooden Sign
- What Do You Need to Start CNC Wood Carving?
- Best CNC Router Bits for Wood Carving Beginners
- Best Wood for Beginner CNC Carving
- How to Make Your First CNC Wood Carving: Step by Step
- CNC Feeds and Speeds for Beginners: What Do They Mean?
- Beginner CNC Wood Carving Projects to Try Next
- Common CNC Wood Carving Mistakes and How to Avoid Them
- Building Your First CNC Wood Carving Bit Kit
- Start Simple, Then Keep Carving
- FAQs
Your first CNC wood carving doesn't have to be complicated. With a desktop CNC router, the right bit, and a simple design, you can carve personalized signs, decorative lettering, and other projects—even if you've never used a CNC before.
The trick is to start small. You don't need a collection of expensive router bits or advanced 3D modeling skills to make something worth displaying. A basic V-carved wooden sign is a great first project because it teaches the fundamentals you'll use again and again.
In this guide, we'll explain which CNC router bits beginners actually need, how to choose wood, what feeds and speeds mean, and how to complete your first carving. We'll also share ToolsToday project videos and downloadable plans so you can see the process in action.
Quick Take: Getting Started with CNC Wood Carving
- Start with a V-carved sign. Lettering is a manageable way to learn toolpaths, workholding, and machine setup.
- Choose a 60° or 90° V-bit. Both work for lettering; the right angle depends on the design and desired depth.
- Practice on poplar or basswood. They're relatively easy to machine and less expensive than premium hardwoods.
- Check your shank size. Many desktop CNC routers accept 1/4-inch shank bits, but compatibility varies.
- Test before carving. Verify your toolpaths, zero position, and cutting settings before running the full project.
- Save 3D carving for later. Learn basic V-carving first, then explore ball nose bits and relief carving.
What Is CNC Wood Carving?
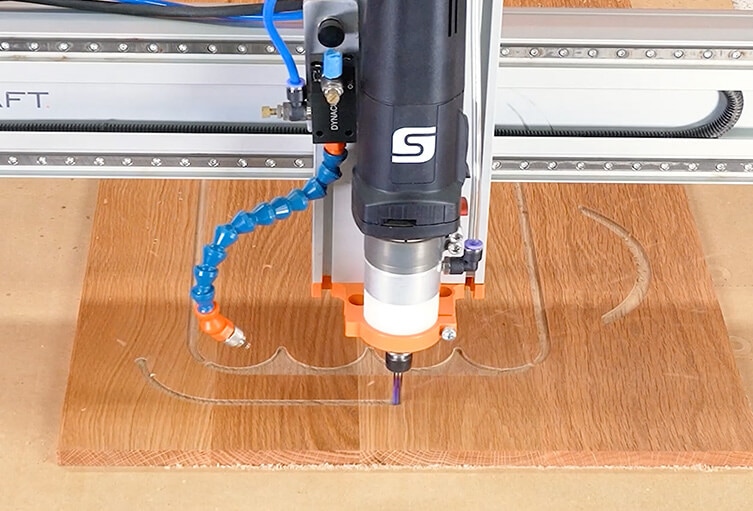
CNC wood carving uses a computer-controlled router or spindle to remove material from wood according to a digital design. Instead of guiding a handheld router yourself, you create or import a design, generate cutting instructions called toolpaths, and let the CNC machine follow them.
Most beginner CNC woodworking projects fall into three categories:
- 2D cutting: The machine follows outlines at specified depths, such as cutting a wooden letter or decorative shape from a board.
- 2.5D carving: The machine creates recessed or raised details using pockets, grooves, and varying cutting depths. V-carved signs and lettering are common examples.
- 3D carving: The cutting tool follows a contoured surface to create sculpted shapes, such as decorative reliefs, animals, or dimensional artwork.
You don't have to master all three at once. V-carving is an excellent starting point because it produces impressive results with relatively simple designs and tooling.
Your First CNC Project: A V-Carved Wooden Sign
For your first project, consider carving a word or short phrase into a flat wooden board. A sign teaches you how to position a design, select a router bit, create toolpaths, secure your material, and finish a carving.
Watch: How to Make a CNC Sign
New CNC owners should use the plans as a learning reference and verify every toolpath and machine setting before cutting. Alternatively, create a simpler text-only design in your own software to practice the same fundamentals.
What Do You Need to Start CNC Wood Carving?
You need five basic things to begin carving wood with a CNC router.
1. A CNC Router
A desktop CNC router is sufficient for many signs, coasters, and small decorative carvings. Check your machine's working area, spindle or router specifications, collet sizes, and operating instructions before choosing a project.
2. Design and Toolpath Software
CAD software creates or edits the design. CAM software converts that design into toolpaths, including cutting depths, bit selections, and movement instructions. Some programs combine both functions.
Popular CNC workflows use software such as Vectric VCarve, Carbide Create, Easel, or Autodesk Fusion, depending on the machine and project. You will also need a compatible post-processor or machine-control workflow to produce instructions your CNC can run.
3. Workholding
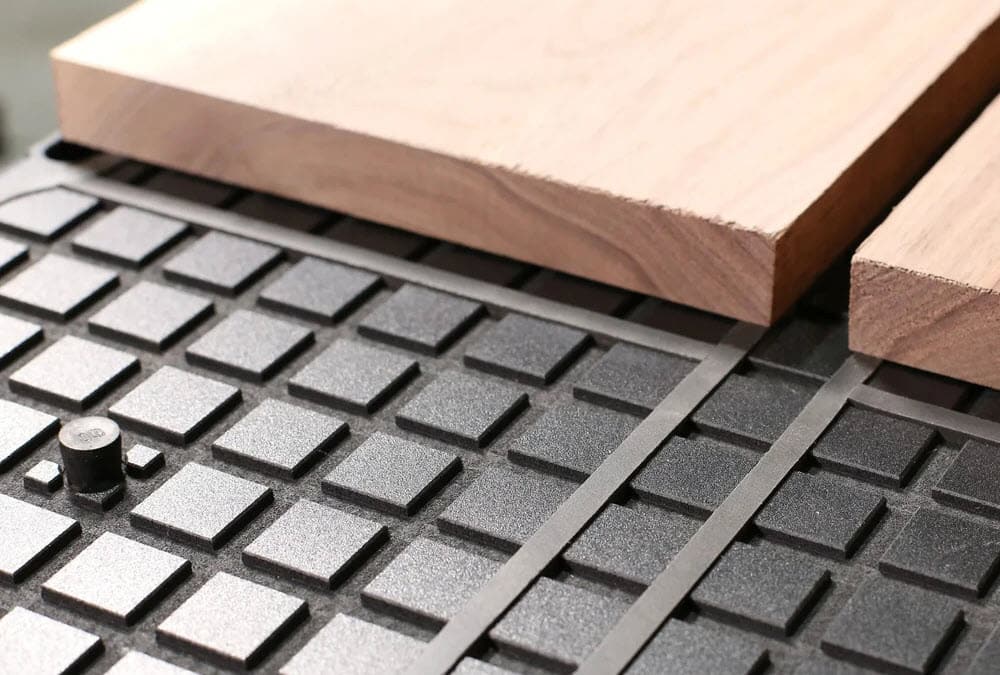
Your wood must remain firmly secured throughout the cut. Depending on the machine, you might use clamps, a fixture, a properly applied workholding tape system, or another approved method. Make sure clamps and fixtures are outside the toolpath.
4. Dust Collection
CNC carving produces chips and fine airborne wood dust. Use suitable dust extraction, preferably with a dust shoe or enclosure compatible with your machine, and appropriate respiratory protection when needed. MDF requires particular care because machining it generates substantial fine dust.
5. CNC Router Bits
The cutting bit determines the shape of the carving. V-bits create lettering and angled grooves, flat end mills clear pockets, and ball nose bits create rounded 3D surfaces. You only need a few types to get started.
Best CNC Router Bits for Wood Carving Beginners
If you're wondering which CNC router bits to buy first, start with the projects you want to make—not the largest available bit set.
For basic signmaking, one properly sized V-bit may be enough. As you move into pocketing, profiling, and 3D carving, you can add more specialized tools.
| Bit Type | What It Does | Typical First Project |
|---|---|---|
| 60° V-bit | Creates narrow V-shaped grooves and detailed lettering | Small personalized sign |
| 90° V-bit | Creates wider V-grooves and decorative lettering | Welcome sign or nameplate |
| Flat end mill | Clears flat-bottom pockets and recessed areas | Recessed coaster design |
| Downcut spiral bit | Cuts pockets and profiles with cleaner top edges in many woods | Decorative wooden plaque |
| Ball nose bit | Finishes rounded contours and sculpted surfaces | Simple 3D relief |
| Tapered ball nose bit | Carves fine 3D details with a tapered body for added support | Detailed decorative relief |
60° vs. 90° V-Bits: Which Should You Choose?
Both are useful for CNC signmaking. The difference is the included angle at the cutting tip.
A 60° V-bit can produce narrower, deeper grooves for a given width of lettering, making it useful for smaller details. A 90° V-bit creates a wider groove at the same depth and is often useful for larger lettering and decorative designs.
Neither angle is automatically better. A V-carving toolpath can vary its depth according to the width of the design, so your choice affects how deeply the machine must cut to produce the desired result.
For your first sign, choose a bit that matches your lettering and the capabilities of your CNC. If you're using downloadable plans, check which bit geometry the toolpaths require.
When Do You Need a Ball Nose Bit?
Ball nose bits have rounded cutting tips that follow curved 3D surfaces without leaving the flat-bottom geometry of a standard end mill. They're commonly used for finishing relief carvings after a larger bit removes the bulk of the material.
Tapered ball nose bits combine a small rounded tip with a tapered body, making them useful for detailed carving where a very small straight tool might lack sufficient rigidity.
Explore the ToolsToday 2D and 3D CNC Carving Router Bits collection when you're ready for dimensional projects.
Before buying any bit: Confirm its shank fits your collet, its cutting diameter and length suit your design, and its specifications support your material and machine. Never assume that a bit shown in a video will fit every desktop CNC.
Best Wood for Beginner CNC Carving
The wood you choose can make your first carving much easier—or much more frustrating. For beginners, look for relatively uniform grain, a flat surface, and material that machines predictably. Save expensive or highly figured hardwoods until you're comfortable with your setup.
- Basswood: Soft, fine-grained, and easy to carve. A good choice for practicing detailed lettering and decorative designs.
- Poplar: Affordable and widely available, with generally manageable cutting characteristics. Excellent for painted signs.
- Cherry: Machines well with appropriate tooling and produces attractive finished projects, though it costs more than practice woods.
- Maple: Hard and capable of crisp details, but it demands more attention to bit selection, feed rate, and cutting depth.
- MDF: Consistent and useful for test cuts, but generates substantial fine dust and requires effective dust extraction.
For your first sign, we'd choose a flat piece of poplar or basswood. Avoid heavily warped boards, loose knots, and reclaimed wood containing hidden metal. Check the material's thickness and make sure its surface is reasonably level before carving.
How to Make Your First CNC Wood Carving: Step by Step
Here's the basic workflow for a simple V-carved sign. The same process applies to many other beginner CNC projects.
Step 1: Choose or Create Your Design
Start with a short word, name, or simple graphic. Avoid extremely small lettering and intricate details on your first attempt.
You can draw the design in your CNC software or import a compatible vector file, such as an SVG. Make sure the design fits comfortably within your wood blank, leaving room for clamps and a border.
Step 2: Choose the Right Bit
Select a V-bit appropriate for the lettering size and the toolpath you're planning. A 60° or 90° V-bit is a practical starting point.
Confirm that the shank fits your collet and that the bit has enough cutting length for the planned carving. Enter the correct bit geometry into your CAM software.
Step 3: Create and Preview Your Toolpaths
Choose a V-carving operation in your CAM software and select the lettering or design you want to carve.
Set the material dimensions, bit, cutting parameters, and any required depth limits. Preview the toolpath before exporting it. Look for unexpected deep cuts, missing letters, or movements outside the workpiece.
Remember that V-carving software may automatically change the cutting depth as the width of the lettering changes. Don't assume every groove will be the same depth.
Step 4: Secure the Wood
Fasten the workpiece securely to the CNC bed using a method approved for your machine. Make sure it cannot shift, lift, or vibrate during cutting.
Check that the bit, collet, dust shoe, and spindle assembly can travel throughout the toolpath without hitting clamps or fixtures.
Step 5: Set X, Y, and Z Zero
Your CNC needs to know where the design begins.
- X and Y zero: Establish the horizontal origin specified in your CAM setup, such as a material corner or the center of the board.
- Z zero: Establish the vertical reference, usually the top of the material or the machine bed, depending on your toolpath setup.
Use the same origin in your machine setup that you selected in the software. A wrong Z-zero can cause the machine to carve too deeply, miss the surface, or damage the workpiece.
Step 6: Run a Simulation and Clearance Check
Review the software simulation, confirm the correct machine program is loaded, and check your work offsets, tool settings, and safe travel heights.
Where your machine supports it, perform a safe air pass above the workpiece with the cutting tool clear of the material. Keep clear of the moving machine and verify the intended path before cutting.
A small test carving in scrap wood is also worthwhile, particularly when trying a new bit or material.
Step 7: Carve the Sign
Start the dust collection, put on appropriate eye and hearing protection, and run the job according to your CNC manufacturer's instructions.
Watch the initial cutting moves from a safe position. Listen for unusual vibration or chatter and watch for excessive burning, poor chip evacuation, or movement of the workpiece.
Know how to stop the machine immediately if something goes wrong. Never reach into the cutting area while the spindle or machine is moving, and don't leave the CNC unattended while it's operating.
Step 8: Clean Up and Finish
Once the machine has stopped and the spindle is no longer rotating, remove the workpiece. Brush or vacuum away loose chips and inspect the carving.
Remove any remaining fuzz carefully, then sand the surrounding surface without rounding over the carved details. Depending on your design, you can apply paint, stain, or a suitable clear finish.
Congratulations—you've completed the same basic sequence used in more advanced CNC woodworking projects.
CNC Feeds and Speeds for Beginners: What Do They Mean?
Feeds and speeds sound complicated, but the basic idea is straightforward: your bit needs to move through the wood at a rate that lets it cut efficiently without overloading the tool or creating excessive heat.
Three terms matter most:
- Feed rate: How quickly the cutter travels through the material during a cutting move, usually measured in inches per minute (IPM) or millimeters per minute.
- Spindle speed: How fast the cutting bit rotates, measured in revolutions per minute (RPM).
- Chipload: The approximate thickness of material removed by each cutting edge during a revolution.
For a conventional milling cut, the basic chipload relationship is:
Chipload = Feed Rate ÷ (RPM × Number of Flutes)
This is a useful starting concept, but V-carving and detailed 3D toolpaths involve changing cutter engagement, so the actual cutting conditions can be more complicated.
Why does this matter?
If the feed rate is too aggressive for the bit, material, or machine, the cutter may chatter, deflect, or break. If the feed is too slow relative to spindle speed, the cutter may rub instead of cutting efficiently, producing heat and burn marks.
Cutting depth and width also matter. A shallow engraving pass places different demands on a bit than a deep pocketing operation.
Our recommendation: Start with the bit manufacturer's feeds-and-speeds guidance for your material and tool diameter. Account for your machine's rigidity and power, then make a conservative test cut and adjust based on the result. Don't copy settings from a video without checking whether they apply to your setup.
For more background, see our Guide to CNC Router Bits.
Beginner CNC Wood Carving Projects to Try Next
Once you've made a simple sign, you're ready to explore different lettering styles, finishes, and cutting techniques. Here are four directions to try.
1. Personalized Family Sign
Primary bit: 60° or 90° V-bit, depending on the design.
A personalized family sign builds on your first project while introducing more decorative lettering and layout decisions.
Watch: How to V-Carve CNC Signmaking
2. Two-Color Nautical Sign
Primary bit: 90° V-bit.
Once you're comfortable with basic V-carving, try adding color. A painted sign introduces masking, paint application, and careful finishing.
Watch: How to Make a 2 Color CNC Sign
For this style of project, the ToolsToday SIGN-004 CNC Signmaking Essentials Pack combines an Amana Tool 90° insert-carbide V-groove bit with ORAMASK stencil film, a weeding hook, and a plastic spreader.
It's a useful option for signmakers who want clean painted lettering without painstakingly painting each groove by hand.
3. Engraved Wooden Coasters
Bits: V-bit for engraving; flat end mill for optional recessed areas.
Coasters are good practice for repeating a design consistently. Start with a simple monogram or geometric pattern, then experiment with shallow pockets or decorative borders.
Keep the design relatively large and avoid fragile details. Because coasters are handled frequently, choose a suitable finish that can withstand ordinary use.
4. Simple 3D Relief Carving
Bits: Flat end mill for roughing, followed by a ball nose or tapered ball nose bit for finishing.
Ready for something more dimensional? A shallow relief carving introduces curved surfaces, roughing and finishing toolpaths, and the importance of stepover—the distance between adjacent passes.
A smaller finishing stepover generally produces a smoother surface but increases machining time. Detailed 3D projects may also require more advanced CAM capabilities than basic V-carving.
Watch: 3D CNC Carving
Common CNC Wood Carving Mistakes and How to Avoid Them
Even experienced CNC users occasionally make setup mistakes. The important thing is to recognize problems early and know what to check.
1. The Carving Is Too Deep or Too Shallow
Check: Your Z-zero, material thickness, tool length, and toolpath depth settings. Make sure the machine and CAM software use the same Z reference.
2. The Wood Has Fuzzy or Torn Edges
Check: Bit sharpness, cutting direction, wood grain, and feed rate. A downcut spiral may improve top-edge quality on suitable pocketing and profiling operations. For V-carving, the bit angle and sharpness also matter.
3. The Wood Is Burning
Check: Spindle speed, feed rate, bit condition, and chip evacuation. Excessive rubbing can generate heat, especially in dense hardwoods.
4. The Design Shifted During Cutting
Check: Workholding, machine rigidity, and whether the machine lost steps. Stop the job safely before inspecting anything. Don't assume the original zero position is still valid.
5. Fine Lettering Looks Rough
Check: Whether the V-bit angle and tip geometry suit the letter size. Extremely narrow details may not carve cleanly in coarse-grained wood. Try a larger design or finer-grained material.
6. The Carving Depth Varies Across the Board
Check: Whether the stock is flat and parallel to the CNC's working plane. Even small height differences can noticeably change the appearance of shallow V-carved lettering.
7. The Bit Breaks or the Machine Chatters
Check: Cutting depth, feed rate, spindle speed, bit stickout, workholding, and tool diameter. Small carving bits are especially vulnerable to excessive cutting forces.
Most beginner problems are easier to solve when you change one variable at a time and test on scrap before returning to the finished project.
Building Your First CNC Wood Carving Bit Kit
As your skills grow, your bit collection can grow with them. There's no need to buy every carving bit before making your first sign.
Here's a practical upgrade path:
- Start with one V-bit. Learn lettering, toolpaths, and basic signmaking.
- Add a flat end mill or downcut spiral. Create pockets, profiles, and more complex signs.
- Add a second V-bit angle. Experiment with different lettering sizes and groove profiles.
- Move into ball nose tooling. Begin carving decorative 3D reliefs and contoured surfaces.
If painted signs are your goal, consider the SIGN-004 Signmaking Essentials Pack. For dimensional carving, explore our 2D and 3D CNC Carving Router Bits, including specialized ball nose and tapered carving tools.
You can also browse ToolsToday's downloadable CNC plans for ideas as you build your skills. Always check the required software, bit specifications, machine compatibility, and project terms before purchasing or running a plan.
Start Simple, Then Keep Carving
Your first CNC wood carving doesn't need intricate artwork or hours of machining. A clean, well-executed V-carved sign is already a successful project—and it teaches skills you'll use for years.
Begin with a simple design, choose the right bit, secure your wood, and verify your setup. Once you're comfortable, try decorative lettering, painted signs, pockets, and eventually 3D relief carving.
The best way to learn CNC wood carving is to make something, study the result, and make the next project a little better.
FAQs
What is the best CNC router bit for beginners?
A 60° or 90° V-bit is a good starting point for wooden signs and lettering. Choose the angle based on the design, and confirm that the bit's shank fits your CNC router or spindle.
What is the easiest wood to carve with a CNC?
Basswood and poplar are good beginner choices because they're relatively easy to machine and affordable. MDF can also be useful for test cuts, but it produces substantial fine dust and requires effective dust extraction.
Can you do 3D wood carving with a desktop CNC?
Yes, many desktop CNC routers can produce 3D relief carvings, provided the machine has enough travel, suitable software, and compatible tooling. Ball nose and tapered ball nose bits are commonly used for finishing 3D contours.
What's the difference between a 60° and 90° V-bit?
A 60° V-bit creates a narrower groove at a given cutting depth, while a 90° V-bit creates a wider groove. The best choice depends on lettering size, desired appearance, and the depth the design requires.
Why is my CNC carving too deep?
An incorrect Z-zero is a common cause. Check whether your toolpath references the top of the material or the machine bed, and verify your tool length, stock thickness, and cutting depths before restarting.
Do I need expensive software to start CNC wood carving?
Not necessarily. Some CNC machines include beginner-friendly design and toolpath software, while other programs offer free or limited-use options. Check that your chosen software can generate compatible machine instructions and supports the carving operations you want to perform.