How to Make Jewelry on a Small CNC Router
Table of Contents
- Introduction: Why Make Jewelry on a Desktop CNC Router?
- What You Can Make on a Nomad CNC
- Why the Nomad Is Ideal for Jewelry Work
- Step-by-Step: Making Your First CNC Jewelry Piece
- Tips for Success With Small-Scale CNC Jewelry
- Advanced Jewelry Techniques on the Nomad
- Recommended Bits & Accessories for CNC Jewelry
- Conclusion: Why the Nomad Is One of the Best CNC Routers for Jewelry
- FAQs
Introduction: Why Make Jewelry on a Desktop CNC Router?
Jewelry-making on a CNC router is one of the most rewarding ways to use a compact machine. With the right bits and good design practices, you can cut metal, shape wood, engrave shell materials, and produce extremely detailed pieces with repeatable precision. Small CNC routers are naturally suited for jewelry: the workpieces are small, the tolerances are tight, and the materials range from soft hardwoods to non-ferrous metals.
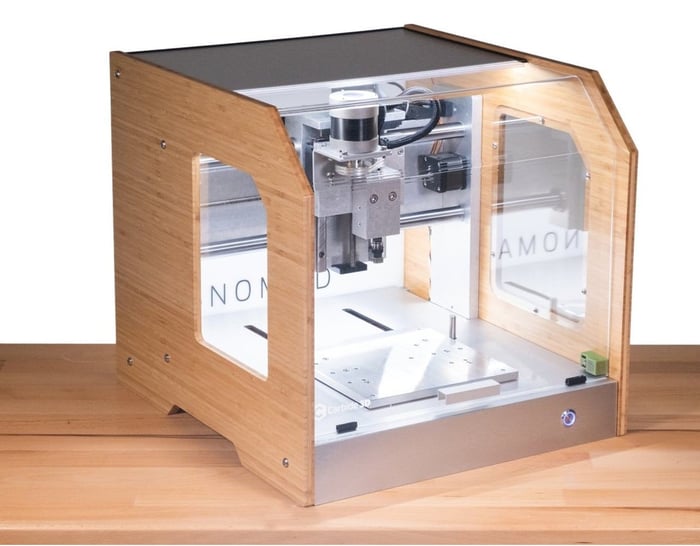
Among these compact machines, the Carbide 3D Nomad stands out. It’s purpose-built for machining small parts, enclosed for cleaner cutting, and rigid enough to handle tiny tools without chatter. Whether you’re making custom pendants, engraved charms, or intricate inlays, the Nomad gives creators a professional-grade workflow right on a desktop.
What You Can Make on a Nomad CNC
The Nomad’s precision and rigidity make it a natural fit for jewelry of all kinds. Makers commonly produce:
- Metal pendants (brass, copper, aluminum, silver)
- Small charms and micro-carvings
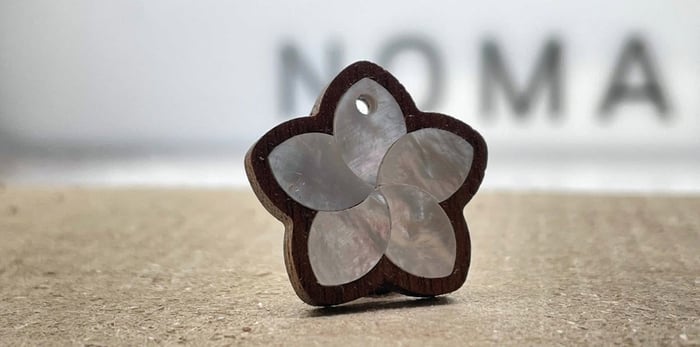
- Mother-of-pearl or wood inlays
- Engraved tags, monograms, and small nameplates
Carbide 3D features several real jewelry projects, including:
- Brass and Silver Heart Necklace
- Mother-of-Pearl Jewelry (great tie-in to the approved project)
- Tiny Charms and Micro Parts
These examples show how versatile the Nomad is for cutting miniature details cleanly.
Why the Nomad Is Ideal for Jewelry Work
True desktop footprint + enclosed cutting area
The Nomad’s compact size makes it perfect for small shops and home studios. The fully enclosed cutting area contains chips—critical when cutting tiny parts that are easy to lose and hard to clean up.
High precision at small tool diameters
Jewelry work often uses cutters as small as 0.015"–0.0625". The Nomad’s stiffness and repeatability help maintain detail at these micro scales, reducing chatter and improving tool life.
Cuts a wide range of jewelry materials
The Nomad can machine:
- Brass, aluminum, copper, silver
- Hardwood and exotic woods
- Shell materials (mother-of-pearl, abalone)
- Acrylic, resin, and composites
Workholding for tiny parts
Successful jewelry machining depends on secure fixturing. The Nomad works well with:
- Double-sided tape on a flat spoilboard
- Fixturing wax for metals and small stock
- Custom soft jaws for repeatable setups
- The Nomad vise or flip-jig for two-sided carving
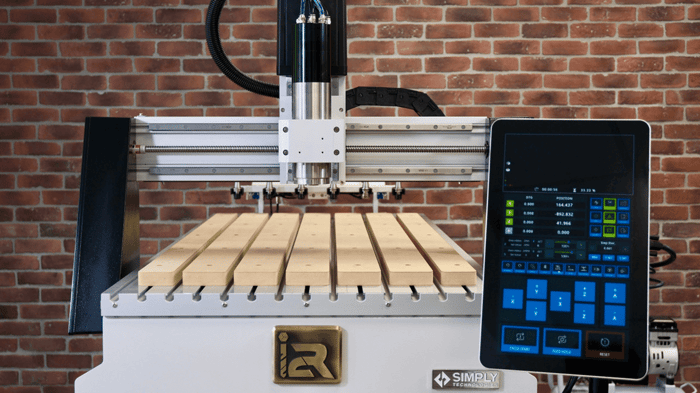
Step-by-Step: Making Your First CNC Jewelry Piece
Here’s a practical workflow for a simple pendant or charm on the Nomad.
1. Choose your material
For beginners, brass, copper, or hardwood are the easiest choices. For inlay work, consider mother-of-pearl or contrasting woods to create a strong visual pop.
2. Design your piece
Use CAD/CAM software such as Carbide Create (included with the Nomad) or Fusion 360 to design your jewelry.
Design tips for small, readable work:
- Simplify interior details and avoid overly thin lines.
- Keep minimum feature sizes larger than your smallest cutter diameter.
- Check that text and logos are still legible at actual size.
3. Prepare your toolpaths
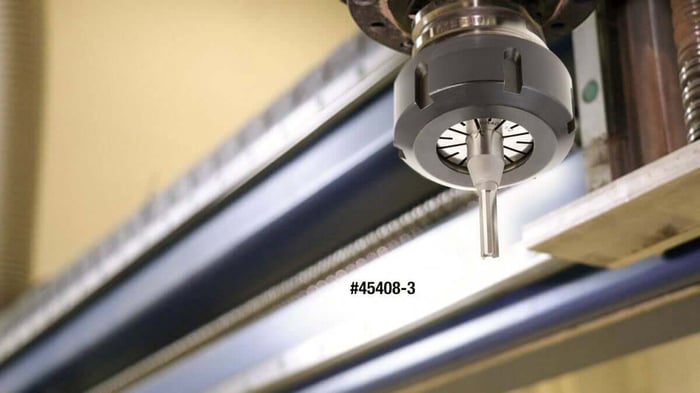
Recommended bits for most Nomad jewelry projects:
- 1/32" (0.8 mm) endmill for profiles and cutouts.
- 0.015"–0.031" engraving bits for fine text and detail.
- Small ballnose bits for subtle 3D profiles and curves.
Feed and speed reminders for tiny tools:
- Use light stepdowns and smaller stepovers to reduce load.
- Increase spindle RPM in non-ferrous metals to keep chips small.
- Start conservatively and only speed up once you trust the toolpath.
4. Workholding setup
Choose your fixturing method based on material and part size:
- Double-sided tape for flat metal and wood sheet. (Also included with the Nomad.)
- Fixturing wax when you need high holding power but still want easy release.
- The vise or flip-jig for thicker stock and two-sided machining.
Always ensure the stock is flat and well supported—tiny parts will show any vibration or movement in the cut.
5. Run the job
Jewelry cuts should be slow and steady rather than aggressive. Keep an eye on chip evacuation, especially in metals where recutting chips can quickly dull or break small tools.
If you are running a new toolpath for the first time, it’s smart to reduce your feedrate override to around 70–80% until you see how the machine behaves.
6. Finishing your jewelry piece
After machining, refine and assemble your piece:
- File and sand any remaining burrs or sharp edges.
- Deburr small holes and interior cutouts.
- Buff and polish metal surfaces for a bright, jewelry-grade finish.
- Apply oil, wax, or clear coat to wooden pendants.
- Add jump rings, chains, earring hooks, or other findings.
Tips for Success With Small-Scale CNC Jewelry
- Start with softer metals or hardwoods while you dial in your process.
- Order your toolpaths so you engrave first, cut out last.
- Use tabs or leave a thin “onion skin” to keep tiny parts from shifting.
- When in doubt, slow down the feeds for your first run on any new design.
Jewelry is one of the few CNC workflows where thousandths of an inch are noticeable, so small improvements in fixturing and toolpath strategy make a big difference.
Advanced Jewelry Techniques on the Nomad
Two-sided machining for dimensional charms
Use alignment pins, dowel holes, or the Nomad flip-jig to precisely align your stock when flipping it over. This allows you to create fully 3D pendants and charms with sculpted fronts and backs.
Fine inlay work
Cut precise pockets and matching inlay pieces for wood-and-metal combinations or mother-of-pearl accents. The Nomad’s accuracy makes tight-fitting inlays much easier to achieve.
Wax machining for lost-wax casting
Machine a detailed wax master model on the Nomad, then use traditional lost-wax casting to pour the final piece in silver or gold. This hybrid process combines CNC precision with classic jewelry techniques.
Micro-engraving and personalization
Use engraving bits to add initials, monograms, symbols, or serial numbers to pendants, charms, and small gift items. Personalized pieces are perfect for Etsy shops and small-batch production.
Recommended Bits & Accessories for CNC Jewelry
For the best results on a Nomad jewelry workflow, it helps to stock your shop with:
- Small-diameter solid-carbide endmills (1/32", 1/16").
- Micro-engraving bits for fine text, logos, and outlines.
- Ballnose bits for 3D sculpting and smooth contours.
- Spoilboard or fixture plate dedicated to small parts.
- Fixturing wax or high-quality double-sided tape for secure holding.
- Polishing and finishing supplies suitable for metals and wood.
ToolsToday carries a full selection of micro-cutting and engraving tools that pair perfectly with compact CNC machines like the Nomad.
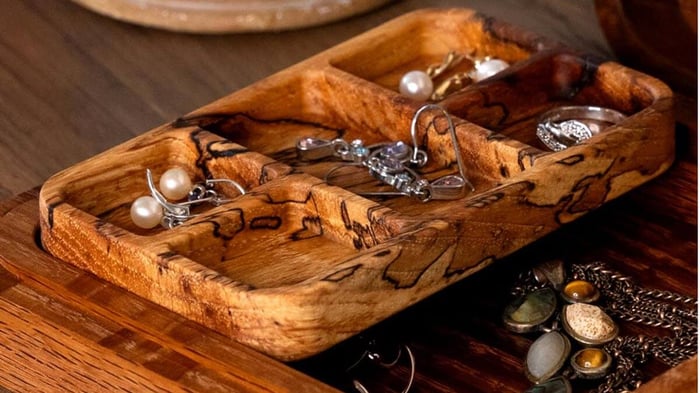
To complete the presentation of your pieces, you can also machine custom jewelry boxes on your CNC. ToolsToday offers downloadable, customizable CNC plans for:
Conclusion: Why the Nomad Is One of the Best CNC Routers for Jewelry
The Carbide 3D Nomad delivers the trifecta that jewelry makers need: precision, material versatility, and a quiet, enclosed desktop footprint. It’s capable of producing heirloom-quality results from metal, wood, resin, and shell materials, all with predictable repeatability.
Whether you’re making your first simple pendant or your tenth inlayed charm, the Nomad makes small-scale CNC jewelry fun, accessible, and professional.
Next step: Explore small-diameter CNC router bits and engraving tools on ToolsToday to start your next jewelry project with confidence.
FAQs
Can a small CNC router like the Nomad really cut metal for jewelry?
Yes. The Nomad can machine non-ferrous metals such as brass, copper, aluminum, and even silver when using the correct feeds, speeds, and small-diameter carbide bits. For beginners, brass is the easiest material to start with.
What’s the best material for beginners making CNC jewelry?
Start with hardwoods or brass sheet. Both cut cleanly and are forgiving while you dial in toolpaths. Once comfortable, you can move on to mother-of-pearl, resin, or silver.
What size bits should I use for jewelry-level detail?
Most projects use 1/32" or 1/16" endmills for profiles and cutouts, plus 0.015"–0.031" engraving bits for fine lines and text. Smaller tools require lighter passes and slower feeds.
How do I keep tiny parts from flying loose or shifting during cutting?
Use strong workholding: double-sided tape, fixturing wax, or the Nomad vise. Always engrave first and cut out last, and use tabs or an “onion skin” to hold small parts securely.
Can the Nomad do two-sided jewelry machining?
Yes. With alignment pins, a flip-jig, or the Nomad vise, you can machine precise front-and-back details for dimensional charms and sculpted pendants.
Is CNC jewelry more precise than hand engraving?
CNC isn’t a replacement for hand engraving, but it allows extremely consistent, repeatable detail—and lets you produce multiple identical pieces for small-batch production.
How long does it take to make a single pendant?
Most CNC-cut pendants take 20–45 minutes depending on material, size, and toolpath complexity. Finishing and polishing add a few additional minutes.
Do I need special software to design CNC jewelry?
No. Free tools like Carbide Create work well for 2D jewelry, while Fusion 360 is ideal for 3D or multi-sided designs. The key is keeping features sized appropriately for tiny tools.