How to Prevent Plywood Tearout: Tips for Clean, Splinter-Free Cuts
Table of Contents
- Quick Take: How to Get Cleaner Cuts in Plywood
- Introduction: The Frustration of Torn Plywood Edges
- Why Does Plywood Tear Out?
- Preventing Plywood Tearout by Tool Type
- Universal Tearout Reduction Techniques
- Choosing the Right Cutting Tool for Plywood
- Achieve Flawless Results With the Right Equipment
- Ready for Cleaner Plywood Cuts?
- FAQs
Quick Take: How to Get Cleaner Cuts in Plywood
Plywood tearout happens when a blade or bit lifts unsupported veneer fibers instead of slicing them cleanly. The best way to prevent tearout depends on the tool you are using, because table saws, circular saws, track saws, routers, and CNC machines all cut plywood differently.
For cleaner plywood cuts, use the right blade or bit, support the veneer fibers at the exit side of the cut, keep the good face oriented correctly, and score or back up the cut when needed.
As a general rule: use a fine-tooth plywood blade for sawing, a down-cut spiral bit for clean top edges, and a compression spiral bit when you need clean edges on both faces.
Introduction: The Frustration of Torn Plywood Edges
Few things are more frustrating than making what should be a simple cut in plywood, only to find a ragged, splintered edge along the veneer.
Plywood tearout happens because the outer veneer is thin, brittle, and often cut across the grain. As a saw blade or router bit exits the material, it can lift and break those delicate fibers instead of slicing them cleanly.
That matters when you are working with cabinet-grade plywood, veneered panels, furniture parts, drawer components, shelving, or finished sheet goods. One bad edge can mean extra sanding, edge banding problems, visible defects, or a ruined panel.
Why Does Plywood Tear Out?
Thin Veneer and Unsupported Fibers
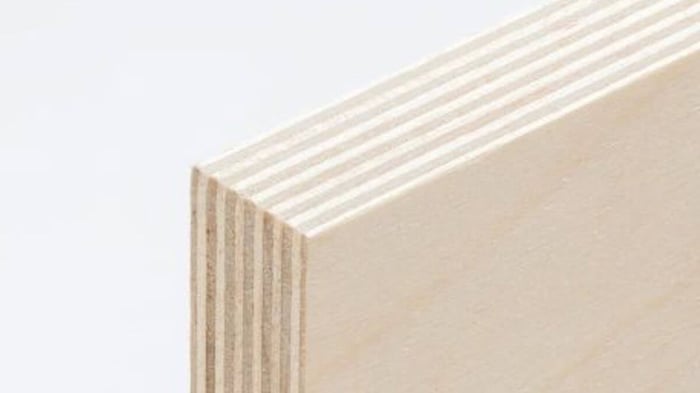
Plywood is made from layers of wood veneer. The inner layers give the panel strength, but the outer face veneer is often very thin. When that surface layer is not fully supported during the cut, it can splinter, chip, or peel away.
Tearout is usually worst where the blade or bit exits the wood. At that point, the veneer fibers are no longer backed up by surrounding material. Instead of being cut cleanly, they can flex, lift, and break away.
Why Tool Direction Matters
Tearout behaves differently depending on the cutting tool. A table saw, circular saw, track saw, handheld router, and CNC router all approach the material differently.
That is why advice like “put the good face up” or “use a high-tooth-count blade” is only useful when it is matched to the tool you are using.
The goal is always the same: support the fibers, slice them cleanly, and reduce the force that pulls them away from the panel.
Preventing Plywood Tearout by Tool Type
Table Saw Plywood Cuts
On a table saw, the blade cuts upward through the plywood. The teeth exit through the top face of the panel, which means tearout is most likely to show on the top surface.
For that reason, when cutting plywood on a table saw, place the good face down.
Use a Fine-Tooth Plywood Blade
For table saw plywood cuts, a sharp 60-tooth to 80-tooth carbide-tipped blade is often a strong choice. More teeth generally mean each tooth takes a smaller bite, which helps reduce chipping and splintering along the veneer.
For the cleanest plywood cuts, look for a blade designed for plywood, melamine, laminates, or fine crosscutting. ATB and Hi-ATB grinds are especially useful because they shear wood fibers cleanly.
Use a Zero-Clearance Insert
A zero-clearance insert supports the plywood right next to the blade. Instead of leaving the veneer hanging over a wide opening, it holds the fibers in place as the blade exits the cut.
This is one of the simplest and most effective upgrades for cleaner table saw cuts in plywood.
Set the Blade Height Correctly
Blade height affects the angle at which the teeth enter and exit the wood. Too low, and the teeth may scrape through the plywood instead of cutting efficiently. Too high, and the cut can become more aggressive than necessary.
For many plywood cuts on a table saw, setting the blade so the teeth rise slightly above the material is a good starting point. Always test on scrap before cutting your finished panel.
Score Delicate Veneer First
For especially delicate plywood, score the cut line with a sharp utility knife before cutting. This severs the top veneer fibers before the blade reaches them, reducing the chance of splintering.
Use a straightedge, make a light pass, and keep the score line exactly where the blade will cut.
See All MDF, Plywood, Chipboard and Laminate Saw Blades
Circular Saw and Track Saw Plywood Cuts
Circular saws and track saws cut differently from table saws. With most handheld circular saws and track saws, the blade enters from the top and exits through the bottom of the plywood.
That means tearout is more likely on the bottom face. For circular saw and track saw cuts, place the good face up unless your specific setup or blade direction indicates otherwise.
Choose the Right Blade for the Saw Size
A 60-tooth to 80-tooth blade may make sense for a 10-inch table saw, but it is not the right way to describe every circular saw or track saw setup. Smaller blades use different tooth counts.
For a 7-1/4-inch circular saw, choose the highest practical tooth count for clean plywood cutting, often in the 40-tooth to 60-tooth range. For track saws, use a fine-finish blade designed for plywood, veneered panels, or laminated sheet goods.
Use the Track Saw Splinter Guard
One reason track saws are popular for plywood is that the guide rail often includes a splinter guard. This supports the fibers directly along the cut line, helping reduce top-face chipping.
For best results, make sure the splinter guard is trimmed correctly, the track is held securely, and the blade is sharp.
Support the Sheet Fully
Plywood sheets can flex during a cut, especially when using a circular saw. That movement can increase vibration and tearout.
Cutting over rigid foam insulation or another sacrificial support surface helps hold the sheet flat and supports the exit face of the cut.
Make a Shallow Scoring Pass
For delicate plywood or prefinished panels, make a shallow scoring pass first. Set the blade just deep enough to cut through the veneer, then make the full-depth cut on the second pass.
This can dramatically reduce splintering on visible surfaces.
Use Painter’s Tape When Needed
Painter’s tape can help hold surface fibers together during the cut. Apply tape over the cut line, mark your line on top of the tape, and cut through it.
This is not a substitute for the right blade, but it can help when cutting prefinished plywood, veneer, or fragile sheet goods.
Router Plywood Cuts
Routers are commonly used for trimming plywood edges, cutting dados, making grooves, flush-trimming panels, and creating joinery. Because router bits cut differently from saw blades, the best tearout prevention strategy is different too.
Why Standard Straight Bits Can Cause Tearout
Standard straight bits can work in plywood, but they are not always the best choice for delicate veneer. Because they cut straight into the material without a shearing spiral action, they can chip the surface layer, especially when trimming across the grain or cutting exposed edges.
Use Down-Cut Spiral Bits for Clean Top Edges
A down-cut spiral bit pushes the wood fibers downward as it cuts. That pressure helps hold the top veneer in place, producing a cleaner top edge.
Down-cut spiral bits are especially useful for dados, grooves, shallow pockets, and visible top-face cuts in plywood.
Use Compression Spiral Bits for Clean Top and Bottom Edges
When you need a clean edge on both faces of plywood, a compression spiral bit is often the better choice. Compression bits combine up-cut and down-cut geometry, pulling fibers toward the center of the panel instead of blowing them out at the top or bottom.
Compression bits only work correctly once the up-cut portion of the bit is fully engaged in the material. That means the bit’s cutting height and the depth of cut must be matched to the plywood thickness.
For cabinet parts, plywood panels, laminated sheet goods, and finished edges, compression bits can make a major difference.
Use a Backer Board for Routing
A sacrificial backer board supports the exit side of the cut. When the router bit exits the plywood, it continues into the scrap instead of breaking unsupported veneer fibers.
This is especially helpful when routing across the grain, trimming edges, or cutting joinery where the back edge will be visible.
CNC Plywood Cuts
CNC routers are excellent for repeatable plywood cutting, but they can still cause tearout if the wrong bit, cut depth, or feed rate is used.
Use the Right Spiral Bit
For CNC plywood cutting, bit selection has a major impact on edge quality.
A down-cut spiral bit can produce a very clean top edge, but it may push chips downward into the cut. This can increase heat if chip evacuation is poor.
An up-cut spiral bit clears chips efficiently, but it can lift fibers on the top face and cause visible tearout.
A compression spiral bit is often the best choice for through-cutting plywood because it helps produce clean edges on both the top and bottom faces.
Match the Compression Bit to the Material
Compression bits have both up-cut and down-cut sections. To get the cleanest result, the up-cut portion must pass fully into the plywood so the cutting forces compress the veneers toward the center of the panel.
If the cut is too shallow, the bit may behave more like an up-cut bit and cause top-face tearout. If the bit’s geometry is not matched to the plywood thickness, the clean-cutting effect may not happen where you need it.
Use Proper Hold-Down and Spoilboard Support
Plywood must stay flat during CNC cutting. If the sheet lifts, vibrates, or loses support near the toolpath, tearout becomes more likely.
A flat spoilboard, strong vacuum hold-down, tabs, clamps, or other workholding methods can help keep the material stable throughout the cut.
Consider Onion-Skinning for Cleaner Through-Cuts
For critical parts, some CNC users leave a very thin layer of material at the bottom of the cut, then remove it with a final pass. This technique, often called onion-skinning, can help reduce movement and support the bottom veneer until the final cleanup pass.
Dial In Feed Rate and Chipload
Even the right bit can produce poor results if the CNC settings are wrong. Too slow, and the bit may rub and generate heat. Too fast, and the cut may become rough or unstable.
For cleaner plywood cuts, use manufacturer-recommended starting points for feed rate, spindle speed, and depth of cut, then test and adjust based on your machine, plywood type, and desired finish quality.
Universal Tearout Reduction Techniques
Use Sharp Cutting Tools
Dull blades and bits crush and tear wood fibers instead of slicing them cleanly. If you are seeing more tearout than usual, inspect the blade or bit before changing your entire setup.
Sharp carbide tooling is especially important when cutting plywood, veneered panels, laminates, and prefinished sheet goods.
Support the Exit Side of the Cut
Tearout often happens where the blade or bit exits the material. Supporting that exit side with a zero-clearance insert, splinter guard, backer board, spoilboard, or sacrificial support surface helps keep veneer fibers from breaking away.
Cut With the Good Face Oriented Correctly
The “good face” should usually be placed on the side where tearout is least likely to occur.
On a table saw, that usually means good face down. With most circular saws and track saws, that usually means good face up. With routers and CNC machines, the correct choice depends on bit geometry, cut direction, and whether the tool is cutting all the way through the material.
Score the Cut Line
Scoring the veneer before cutting can help prevent splintering, especially on delicate plywood, cross-grain cuts, or prefinished panels.
You can score with a sharp utility knife, a shallow saw pass, or a dedicated scoring operation on a CNC.
Test on Scrap First
Plywood varies widely. Veneer thickness, core quality, adhesive, finish, and grain direction can all affect tearout.
Before cutting your finished part, test your blade, bit, feed rate, blade height, or scoring method on scrap from the same sheet.
Choosing the Right Cutting Tool for Plywood
Clean plywood cuts are not just about technique. The right cutting tool makes the job easier, faster, and more repeatable.
For table saws, use a sharp, fine-tooth carbide blade designed for plywood or fine finish cuts. For circular saws and track saws, choose a blade with an appropriate tooth count for the blade diameter and the material. For routers and CNC machines, choose the spiral geometry that matches the edge quality you need.
As a quick guide:
- Table saw: Fine-tooth plywood blade, good face down, zero-clearance insert.
- Circular saw: Fine-finish blade, good face up, full sheet support.
- Track saw: Fine-finish blade, splinter guard, shallow scoring pass if needed.
- Router: Down-cut bit for clean top edges, compression bit for clean top and bottom edges.
- CNC router: Compression spiral bit for clean through-cuts, with proper hold-down and feed settings.
Achieve Flawless Results With the Right Equipment
Sharp, high-quality carbide-tipped saw blades slice veneer more cleanly and stay sharper longer. Spiral router bits reduce chatter and tearout by shearing the fibers instead of chopping through them. And for plywood, choosing the right geometry — ATB, Hi-ATB, down-cut, or compression — can be the difference between a finished edge and a frustrating mess.
Whether you are building cabinets, furniture, drawer boxes, shelving, built-ins, or CNC-cut plywood parts, clean edges start with the right blade or bit.
Ready for Cleaner Plywood Cuts?
Explore ToolsToday’s selection of premium saw blades, down-cut spiral router bits, and compression spiral bits designed for cleaner cuts in plywood, veneers, laminated panels, and cabinet-grade sheet goods.
Get the right cutting tool before your next plywood project — and spend less time fixing tearout.
FAQs
What causes plywood tearout?
Plywood tearout happens when saw blades or router bits lift and splinter the thin outer veneer instead of slicing it cleanly, especially where the cut exits the material.
What saw blade is best for cutting plywood without splintering?
A sharp, high-tooth-count carbide blade (typically 60–80 teeth) with ATB or Hi-ATB geometry is often best for cleaner plywood cuts.
Should the good side of plywood face up or down when cutting?
It depends on the tool. Tearout typically happens on the exit side. Table saws cut up, so the good face should be down. Circular saws cut down, and the good face goes up.
Do down-cut router bits reduce plywood tearout?
Yes. Down-cut spiral bits push wood fibers downward, helping protect the top veneer and produce cleaner top edges.
Are compression bits better than down-cut bits for plywood?
For many plywood projects, yes. Compression bits help reduce tearout on both the top and bottom faces, making them ideal for through-cuts, cabinet parts, and CNC applications.