Why Is My Router Bit Leaving a Bad Cut? A Router Bit Troubleshooting Guide
Table of Contents
- Router Bit Troubleshooting at a Glance
- 1. The Wood Has Burn Marks
- 2. The Wood Is Tearing Out or Chipping
- 3. The Top Face of Plywood or Laminate Is Chipping
- 4. The Bottom Face Is Chipping
- 5. The Edge Looks Fuzzy or Hairy
- 6. The Cut Has Waves, Ripples, or Chatter Marks
- 7. The Router Bit Is Slipping in the Collet
- 8. Surfacing Leaves Ridges or Lines
- 9. The Cut Starts Clean but Gets Progressively Worse
- 10. The Cutting Depth Isn't Consistent
- 11. The Router Bit Keeps Leaving Marks Even Though It's Sharp
- Before You Replace the Router Bit: A Quick Troubleshooting Checklist
- Learn to Read the Cut
- FAQs
A router bit can be sharp, spinning properly, and removing material — and still leave a disappointing cut.
Burn marks, chipped edges, fuzzy fibers, chatter marks, ridges, and inconsistent cutting depths are all signs that something isn't quite right. Sometimes the router bit is the problem. Just as often, the cause is the bit geometry, cutting direction, feed rate, depth of cut, workholding, collet, or router/CNC setup.
The good news is that the appearance of the cut can often tell you where to start looking.
This guide will help you diagnose common router cut-quality problems, understand what causes them, and determine whether the solution is a different bit, a different setting, or simply an adjustment to your setup.
Router Bit Troubleshooting at a Glance
What does your bad cut look like? Find the symptom below and click it to jump to the likely causes and solutions.
| What You See | Common Causes | What to Check |
|---|---|---|
| Burn marks | Excess heat, dull bit, poor chip evacuation, incorrect feed/RPM | Bit condition, feed rate, RPM, chip removal |
| Torn or chipped edge | Grain direction, dull bit, cutting direction, bit geometry | Sharpness, feed direction, depth of cut |
| Chipping on top of plywood | Cutting action pulling fibers upward | Consider downcut or compression geometry |
| Chipping on the bottom | Cutting action pushing fibers downward | Consider upcut or compression geometry |
| Fuzzy or hairy edge | Wood fibers aren't being cleanly severed | Sharpness, grain, feed, bit geometry |
| Waves, ripples, or chatter marks | Vibration, runout, excessive bit extension | Collet, bearings, rigidity, workholding |
| Bit slips or cutting depth increases | Dirty or worn collet, improper insertion, wrong collet size, inadequate clamping | Stop immediately; inspect the bit, shank, collet, and installation |
| Ridges or lines after surfacing | Router/spindle not perpendicular to work surface | Tram, inserts, stepover |
| Cut gets worse as you continue | Heat, resin buildup, tool wear, poor chip evacuation | Stop and inspect the bit |
| Inconsistent cut depth | Workholding, material flatness, bit movement, machine setup | Z-zero, collet, spoilboard, workpiece |
1. The Wood Has Burn Marks
Burning occurs when the cutting edge generates more heat than the bit and workpiece can dissipate. You may see dark marks along the cut, smell scorched wood, or notice discoloration on the router bit itself.
A dull or resin-coated bit is one common cause. Instead of slicing cleanly through the material, the cutting edge creates additional friction.
Feed rate and spindle/router speed matter, too. Moving too slowly can allow the cutting edge to rub against the wood rather than remove a substantial chip. Increasing RPM isn't necessarily the answer; that means the cutting edge contacts the wood even more times per second.
Poor chip evacuation can make matters worse because hot chips remain in the cut and may be recut instead of being carried away.
CNC users should be particularly careful about simply slowing down when they encounter burning. Feed rate, RPM, number of cutting edges, and chip load work together.
What to try:
- Inspect and clean the bit; check for dull or damaged cutting edges.
- Review feed rate, RPM, depth of cut, and chip evacuation together rather than adjusting one setting blindly.
- If burning continues despite an appropriate setup, consider a sharper bit or geometry better suited to the material.
For a more detailed explanation, see Why Your CNC Router Bit Is Burning Wood (And Why Slowing Down Might Make It Worse).
2. The Wood Is Tearing Out or Chipping
Tearout occurs when wood fibers are pulled away rather than being cleanly severed. You may see small chips along an edge or larger sections of grain torn from the workpiece.
In solid wood, grain direction is often a major factor. Routing against difficult or changing grain can cause the cutting edge to lift fibers ahead of the cut.
Taking too much material in one pass can also increase the forces acting on those fibers. Several lighter passes may produce a cleaner result.
Check the cutting edges as well. A sharp router bit shears fibers; a worn edge requires more force and can increase tearout.
Cutting direction can make a difference. Conventional routing is generally the standard and safest technique when using a handheld router, but certain difficult-grain situations may benefit from carefully controlled techniques such as a light climb-cutting pass. Climb cutting with a handheld router requires extra caution because the router can pull itself rapidly along the workpiece.
Finally, consider whether the router bit's cutting geometry is appropriate for the material. The solution for tearout in solid hardwood may be very different from the solution for chipped veneer on plywood.
What to try:
- Check that the bit is sharp and suitable for the wood and cut.
- Reduce the amount of material removed in a single pass.
- Consider grain direction and use a supported, controlled cutting technique appropriate for your router.
3. The Top Face of Plywood or Laminate Is Chipping
If the cut itself looks acceptable but the top surface of plywood, veneered panels, or laminated material is chipped, look at the cutting direction of the bit.
An upcut spiral router bit pulls chips upward and out of the cut. That makes upcut bits particularly effective at chip evacuation, especially in deeper cuts.
But that upward cutting action can also lift the fibers or veneer at the top surface of the workpiece.
When top-edge finish is the priority, a downcut spiral bit may produce a cleaner result because its cutting action pushes downward toward the workpiece.
There is a tradeoff: those chips are also being pushed downward. In deeper cuts and enclosed grooves, chip evacuation can therefore become more difficult.
What to try:
- Consider downcut geometry when protecting the top face is the priority.
- Check bit sharpness and whether the material is adequately supported.
- Ensure chips can escape, particularly when using downcut bits in deep grooves.
4. The Bottom Face Is Chipping
When the top edge looks clean but the bottom face is chipped, the cutting action may be pushing fibers toward the bottom of the workpiece.
This can occur with a downcut spiral bit. Downcut geometry is excellent for protecting the top face, but it doesn't necessarily protect the bottom edge as the bit exits the material.
If bottom-edge quality is more important, an upcut bit may be the better choice.
But what if both faces need to be clean?
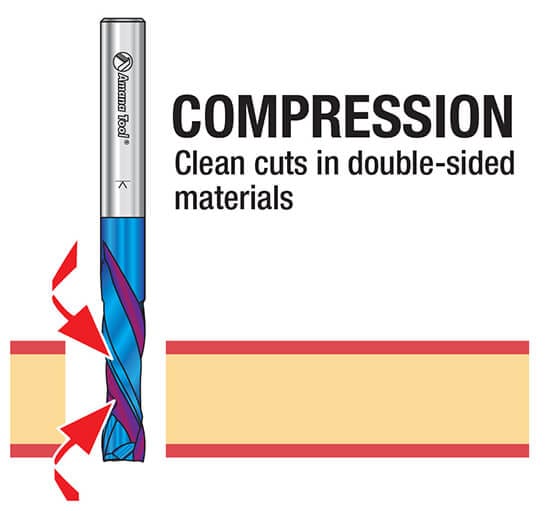
That's one of the primary applications for a compression router bit.
Compression bits combine upcut and downcut cutting geometry. The cutting action pushes the top fibers downward and the bottom fibers upward, effectively compressing both faces toward the center of the panel.
There's an important catch: the compression geometry has to be properly engaged.
If the first pass is too shallow and remains entirely within the upcut portion at the tip of the bit, the bit can still pull upward on the top veneer and cause chipping. The depth of cut must be sufficient to place the top surface within the downcut portion of the cutting edge.
Simply switching to a compression bit doesn't guarantee chip-free plywood. The cutting depth and setup still matter.
What to try:
- Consider upcut geometry when the bottom face is the primary concern.
- For clean edges on both faces, consider a compression bit with the correct cutting depth and setup.
- Confirm that the compression bit's downcut section is engaged at the top surface.
5. The Edge Looks Fuzzy or Hairy
A fuzzy edge isn't quite the same thing as tearout.
Instead of chunks or chips being removed, individual fibers remain attached to the edge because they haven't been cleanly severed.
Some woods are naturally more prone to fuzzing than others, particularly softer or stringier species. Composite materials can behave differently again.
But excessive fuzz can also indicate a dull cutting edge. A sharp edge slices through fibers; a worn one may push, bend, or partially tear them.
Consider the direction of the grain and the direction of the cut. If the fuzz appears primarily on one section of a profile or one side of the workpiece, changing grain direction may be contributing to the problem.
What to try:
- Inspect the bit for wear and check whether the cutting geometry suits the material.
- Try a lighter finishing pass where appropriate.
- Compare results across grain directions to identify whether the problem is material-related.
6. The Cut Has Waves, Ripples, or Chatter Marks
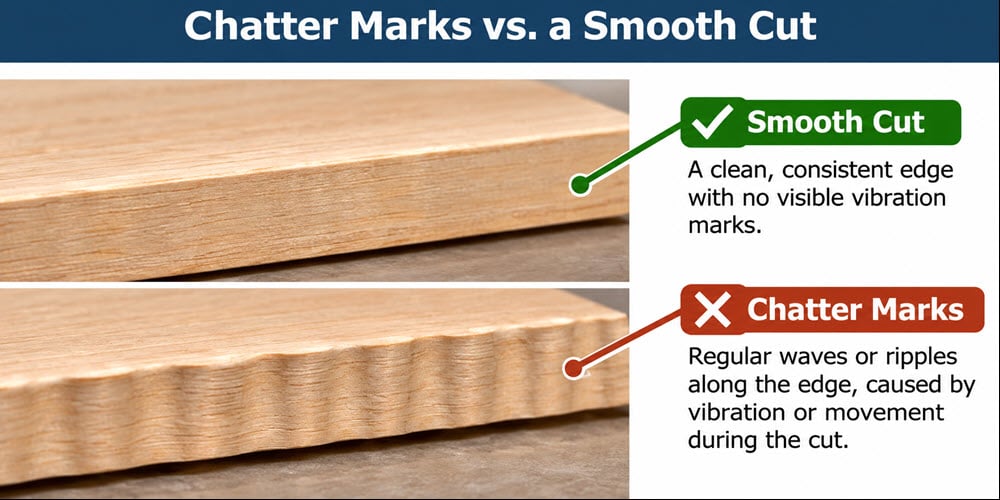
Regular waves or ripples along a routed edge usually point to movement somewhere in the cutting system.
That movement might come from the router bit, router or spindle, workpiece, or machine itself.
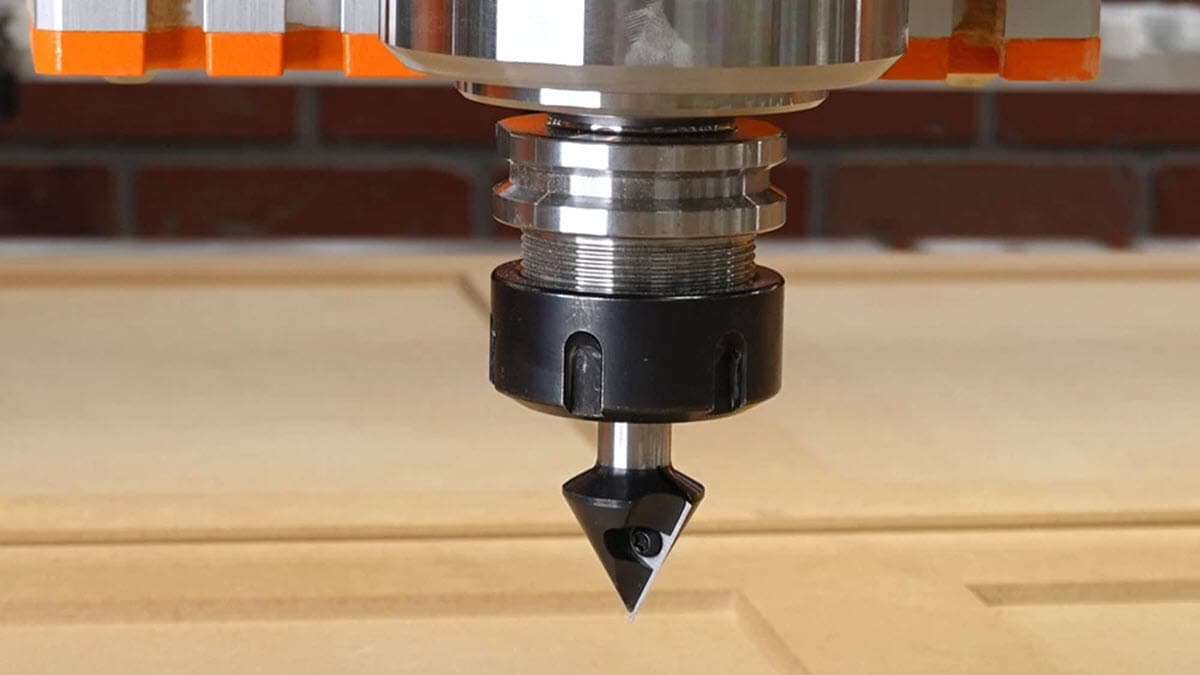
Start with one of the simplest things to check: how far does the router bit extend from the collet?
The farther a bit projects from the collet, the greater the leverage acting on the tool. Excessive extension can increase deflection and vibration, especially with small-diameter or long cutting tools.
Do not insert the bit so deeply that the cutting edge or flute transition enters the collet, however. The collet should securely grip the shank.
Other possible causes of chatter include:
- A dirty, damaged, or worn collet
- Router bit runout
- Worn router or spindle bearings
- A dull or damaged cutting edge
- Excessive depth of cut
- Feed rates that don't suit the tool and material
- Insufficiently secured workpieces
- Flex in the router table or CNC machine
What to try:
- Check workholding, collet condition, router/spindle bearings, and machine rigidity.
- Minimize unnecessary bit extension while maintaining proper shank engagement.
- Review depth of cut and feed settings after ruling out mechanical movement.
Don't automatically assume that changing RPM will solve chatter. First make sure everything that is supposed to remain rigid actually is.
7. The Router Bit Is Slipping in the Collet
If a cut starts at the correct depth but gradually becomes deeper, stop the router or CNC machine and check whether the bit has moved in the collet.
A router bit should remain securely clamped throughout the cut. If it slips downward, even a small amount, the cutting depth changes. Continued movement can damage the workpiece, the bit, or the machine and can create a serious safety hazard.
Possible causes include:
- A dirty collet or router bit shank
- Resin, oil, dust, or other contamination on the gripping surfaces
- A worn or damaged collet
- Using a collet that does not correctly match the bit's shank diameter
- Insufficient tightening
- Improper bit insertion
The bit should be inserted far enough for the collet to grip the shank securely, but it should not be bottomed out in the collet or router spindle. Likewise, the cutting edge or flute transition should not extend into the gripping area of the collet.
What to try:
- Stop immediately and inspect the bit shank and collet for movement, dirt, damage, or wear.
- Clean the mating surfaces as appropriate and verify the collet matches the shank diameter.
- Replace a worn or damaged collet before resuming work.
If a bit has slipped, don't simply reposition it and continue cutting. A router bit that will not remain securely clamped should not be used until the cause has been identified and corrected.
8. Surfacing Leaves Ridges or Lines
A large spoilboard or surfacing router bit should leave a relatively flat, consistent surface. If each pass leaves a visible ridge, the router bit itself may not be the primary problem.
The router or spindle may be slightly out of tram — meaning its axis isn't perfectly perpendicular to the work surface.
When a wide cutter is tilted even slightly, one side of the cutter removes more material than the other. Adjacent passes then leave ridges or a characteristic pattern across the surface.
Also inspect replaceable inserts, if your surfacing tool uses them. A damaged insert, improperly seated insert, or cutting edge at a different height can leave marks.
What to try:
- Check router/spindle alignment and tram before replacing the cutter.
- Inspect and correctly seat replaceable inserts, if applicable.
- Review stepover; greater overlap may improve the finish but won't correct a machine that is out of tram.
9. The Cut Starts Clean but Gets Progressively Worse
Pay attention not only to what the defect looks like, but also to when it appears.
If the router begins with a clean cut and the quality gradually deteriorates, something may be changing as the job progresses.
Heat buildup is one possibility. Resin and pitch can accumulate on the cutting edges, increasing friction and reducing the bit's ability to cut cleanly.
Poor chip evacuation can have a similar effect. Chips trapped in the cut may be recut repeatedly, generating additional heat and interfering with the cutting edge.
A cutting edge may also be wearing or becoming damaged during the job, particularly when routing abrasive materials.
What to try:
- Stop and inspect the bit for buildup, discoloration, chipped edges, or unusual wear.
- Check chip evacuation and whether chips are being recut.
- Review cutting settings and material suitability before continuing.
10. The Cutting Depth Isn't Consistent
An inconsistent cutting depth doesn't necessarily indicate a router bit problem at all.
With a CNC router, check whether the workpiece is flat and securely held. Sheet material that lifts from the spoilboard can produce varying depths even when the Z-axis follows exactly the programmed path.
An uneven spoilboard can create similar problems.
Also check:
- Z-zero or tool-length settings
- Workholding
- Material flatness
- Spoilboard flatness
- Collet condition
- Router bit slippage
- Machine rigidity
With a handheld router, make sure the router base remains flat and stable throughout the cut. Tilting the router — even slightly — can change both depth and profile.
What to try:
- Check workpiece flatness, workholding, and spoilboard condition.
- Verify Z-zero or tool-length settings on a CNC router.
- If the cut becomes progressively deeper, stop and check for bit slippage.
11. The Router Bit Keeps Leaving Marks Even Though It's Sharp
A sharp bit isn't necessarily the right bit. Router bits use different cutting geometries because materials and operations require different cutting actions.
For example:
- Upcut spiral bits provide effective chip evacuation but may lift fibers at the top surface.
- Downcut spiral bits help protect the top face of sheet goods but push chips downward.
- Compression bits can produce clean top and bottom edges when the compression geometry is properly engaged.
- Straight bits remain useful for many general routing operations.
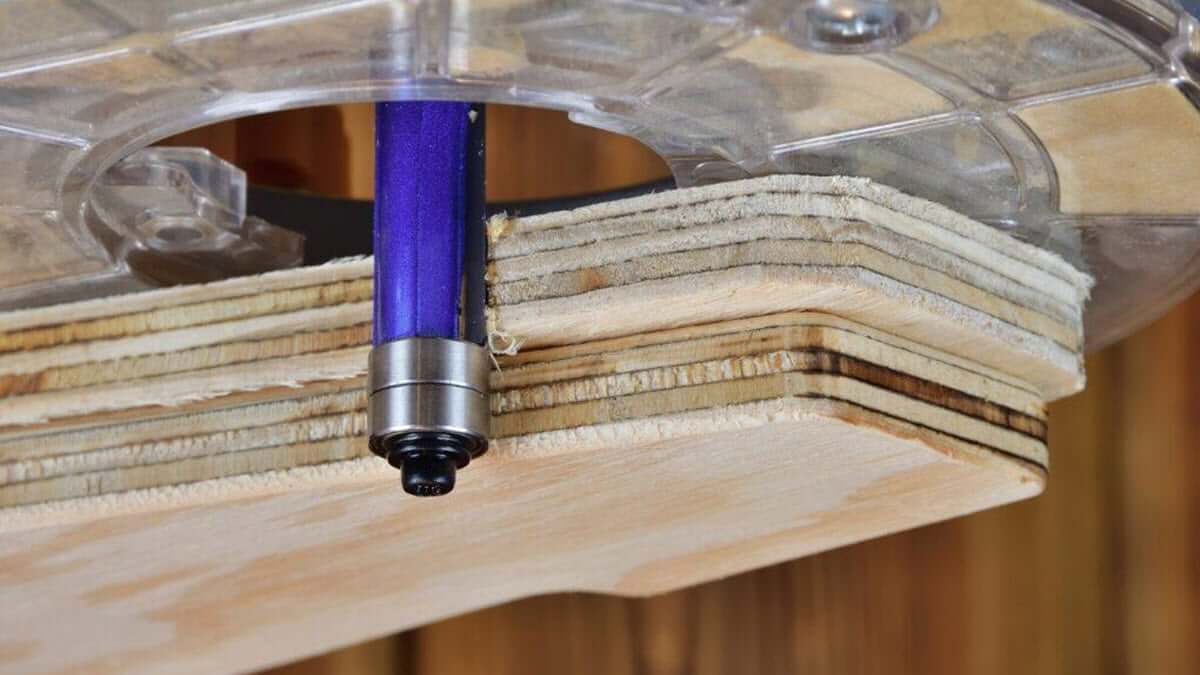
- Flush-trim and pattern bits follow templates or existing edges; bearing condition and placement affect results.
- Material-specific bits use cutting geometry suited to plastics, aluminum, composites, solid surface like Corian®, and other materials.
What to try:
- Identify the material, operation, and surface that requires the cleanest finish.
- Compare those requirements with the bit's intended cutting geometry.
- Check bearing condition and positioning when using flush-trim or pattern bits.
Before assuming something is wrong with your router, ask whether the bit was designed to produce the cut you're asking it to make.
Before You Replace the Router Bit: A Quick Troubleshooting Checklist
When a routed surface doesn't look right, work through these checks before changing several settings at once.
- Inspect the cutting edges. Are they sharp, clean, and free of chips or visible damage?
- Clean the router bit. Resin and pitch buildup can increase friction and affect cutting performance.
- Inspect the collet. Make sure it's clean, undamaged, and the correct size for the bit shank.
- Check bit insertion and extension. Grip the shank securely while minimizing unnecessary extension from the collet.
- Check the depth of cut. If the router is removing a large amount of material at once, try multiple passes where appropriate.
- Confirm cutting direction. Grain direction and router travel can strongly affect edge quality.
- Check feed rate and RPM. Don't change one without considering its relationship to the other.
- Check workholding. The workpiece should not be able to vibrate, flex, or lift during the cut.
- Match the bit geometry to the job. Upcut, downcut, compression, straight, and specialty bits behave differently.
- Look closely at where and when the defect occurs. Top or bottom? With or against the grain? Only in corners? Immediately or after several minutes of cutting? Those clues can point toward the cause.
Learn to Read the Cut
A poor router cut isn't just a problem. It's information.
Burning suggests excessive heat or inadequate chip formation. Chipped veneers may point toward the direction of cutting forces. Regular waves suggest movement or vibration. Surfacing ridges may indicate machine alignment. A cut that deteriorates over time suggests something is changing during the operation.
And sometimes the router, CNC machine, feed rate, and setup are all fine. You're simply asking the wrong cutting geometry to do the job.
Learning to read those clues makes troubleshooting faster — and makes it much easier to choose the right router bit in the first place.
FAQs
Why is my router bit leaving a rough edge?
A rough router cut can result from a dull or dirty bit, incorrect feed rate or RPM, excessive depth of cut, grain direction, vibration, or using the wrong bit geometry for the material. Look closely at the roughness itself: torn fibers, fuzz, chatter marks, and chipped edges can point to different causes.
How can I tell if my router bit is dull?
Signs of a dull router bit include increased cutting resistance, burning, fuzzy or torn edges, slower cutting, and declining cut quality. Inspect the cutting edges for visible wear, chips, or resin buildup before replacing the bit, since a dirty cutting edge can sometimes behave like a dull one.
Why does my router bit chip plywood?
Plywood can chip when the cutting action pulls or pushes the face veneer away from the panel. Upcut bits may chip the top face, while downcut bits may affect the bottom edge. If both faces need a clean finish, a compression bit can help, provided the cutting depth properly engages both the upcut and downcut portions of the bit.
Why is my router bit leaving chatter marks?
Chatter marks usually indicate vibration or movement somewhere in the cutting system. Possible causes include excessive bit extension, router bit runout, a worn or dirty collet, loose workholding, excessive depth of cut, worn spindle or router bearings, or insufficient machine rigidity.
Why does my router bit keep slipping in the collet?
A router bit may slip because the bit shank or collet is dirty, the collet is worn or damaged, the collet doesn't match the shank diameter, the bit was installed incorrectly, or the collet wasn't tightened sufficiently. Stop using the router if the bit moves during a cut and inspect the bit, collet, and installation before continuing.