Top 5 Items for CNC Sign Making
CNC sign making is one of the most common uses for a CNC machine. There are many items that will help improve the quality of your signs. Toolstoday’s Matt Plumlee is going to share the top 5 he depends on to make high quality signs out of wood.

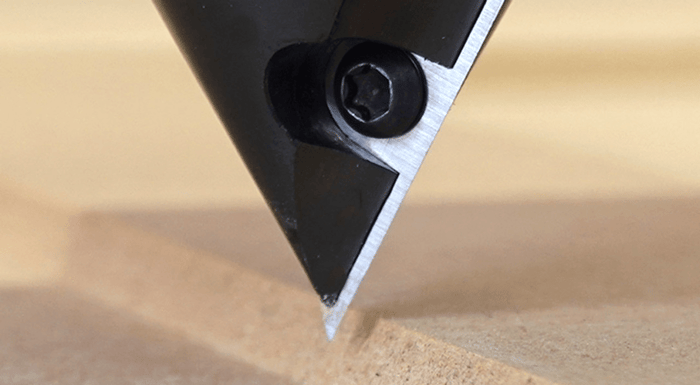
#1 V-Groove Bit
Some of the simplest to make, yet most effective signs are made using a v-carve toolpath and a v-bit. Using a high quality insert carbide v-groove bit will improve your cut quality, reducing the time you need to spend cleaning up your work piece.
My personal favorite is the insert carbide 90° RC-45711 v-bit and, in my opinion, is a bit that everyone should own. Coming in at under $30 this bit is an incredible value as the rotatable insert will give you 4 cutting edges that you can rotate to if one edge becomes dull. Unlike brazed carbide tipped v-groove bits, you keep the body of the v-bit for the life of the tool and simply replace the inexpensive carbide inserts if they become dull. Because these are solid carbide inserts and are not brazed, they are able to be a much harder grade of carbide and will provide up to 4 times longer tool life!
There are many different degree, diameters and shank size options within the insert carbide v-groove bits that we offer that is sure to fit whatever level of machine you’re using or design you’re wanting to cut. The possibilities are endless of what you’re able to carve using a v-groove bit and a v-carve toolpath as it uses the geometry of your bit and size of your design to determine how the machine could cut to make your design.
Be sure to check out the Degrees of a V-Groove buying guide I wrote to help you decide which degree v-bit is right for your project. Having a sharp and clean cutting v-groove bit is one of the best things you can do to improve the quality of the signs you’re making.

#2 Oramask Masking Film
Oramask 813 is an absolute game changer when making multi colored signs. All of the clean up work of having to sand off excess paint and potentially ruining your detailed pieces is a thing of the past with this masking! Simply apply the masking to your piece before carving, paint your design (more on that later) and pull the masking back off for a perfectly clean edge. While I’m talking about Oramask 813, here’s what works best for me to get perfectly clean results every time –
- Ensure your workpiece is sanded down nice and smooth – finish or stain may be applied before the masking is put on, but you must make sure it is FULLY cured before applying as it can cause it to stick.
- Ensure all dust is off the surface of the material using an air compressor, then to verify all dust and particles are off wipe with a clean hand or tack cloth.
- Using a spreader or some thing like a credit card, begin applying the masking from one side using the piece of plastic to push down the masking to the material and ensuring you leave no bubbles in the masking.
- Pull out the backing while pressing it down on the masking with the spreader moving slowly ensuring no bubbles remain
- Cut through the masking to create your design
- Paint the cut area (more tips on this later in this buying guide)
- Once the paint is fully dry remove the masking-
- If the masking has been on a piece for awhile, or you’re using a more open grain wood, it’s possible you will get some grain pull up with the masking when taking it off. To greatly reduce this, use a heat gun or blow-dryer to heat up the masking a bit, making it much easier to remove, and less likely to pull up the wood grain with it.
- Be sure to keep the heat gun far from the masking, and make sure you’re moving it around the entire piece, not focusing on any one area -- you don’t want to melt the masking.
- Use a hook weeding tool to assist with getting up a corner of the masking without damaging the paint or the wood.
- Once most of the masking is off heat up smaller areas with the heat gun to make removing them with the hook weeding tool easier as you get the remaining pieces off the clock face.
These tips will help ensure you’re successful with the Oramask 813 and are things I’ve learned over the years of using this to get perfect results every time using it! I cannot recommend masking for sign making enough. Once you experience it, you’ll wonder how you did it before using it!

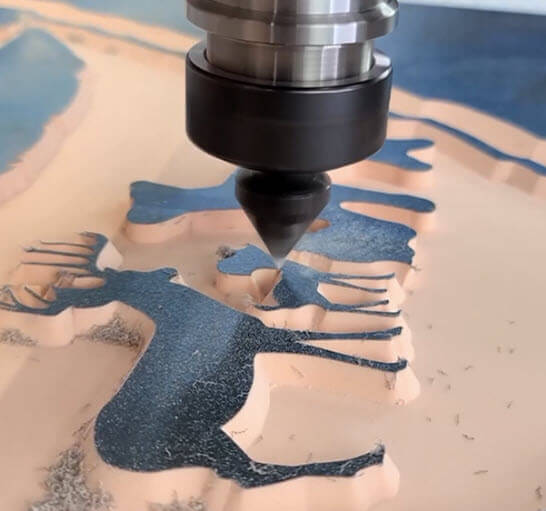
#3 Downcut Bit
When making a sign getting a perfectly clean top surface, or show surface, is incredibly important, and the Spektra™ coated downcut bits will do just that.
A downcut bit forces the chips down which will leave you with a perfectly clean top surface. This is especially important when working with sign masking, like Oramask 813, as anything but a perfectly clean edge will increase the amount of clean up work needed after pulling the masking off.
With the downcut action forcing everything down you will not see any chipping or shredding on the cut edges of properly applied masking making the vast majority of clean up, a thing of the past! Downcut bits are not the perfect solution for every task. Read up more on that in a buying guide I wrote on that topic, but they are a great bit to have for sign making!

#4 High Quality Paint
General Finishes Milk Paint has been my go-to paint for many years when making signs.
It is thicker than normal paint so it is less likely to bleed into the grain of the wood, but one of the best things about it is that it dries very quickly allowing you to continue working on the sign without having to wait overnight for the paint to dry.
I typically use 2 coats of the paint and am able to get both coats on within about 15 minutes, wait for it to dry and I have applied finish to the piece within an hour with great results.
Even though this paint is thicker and doesn’t tend to bleed into the grain like spray paint or any thinner paint would, it still can happen on softer wood.
To prevent this completely, hit the cut area with a little bit of sanding sealer first, let that dry and then put the paint over that. This will essentially eliminate any chance of it the paint bleeding into the grain and getting where you don’t want it.

#5 Use the Best Software to Get the Best CNC Signs
One of the best upgrades you can make to improve your signs is to improve the software you’re using to design them.
Vectric V-Carve Pro software is the easiest software to use that I’ve ever personally tried. The Vectric team has an incredible YouTube channel full of tutorials on how to do different things within the software, as well as a whole library of projects with written instructions explaining each step in great detail.
They make it incredibly simple and easy to design out signs, and I’ve personally designed signs in 5-10 minutes in Vectric that had taken me 30-40 minutes to design out in other software I have used.
Vectric also does a great job with optimizing their toolpaths to save time during machining and even have a built in clean up pass on their V-Carve toolpath to give you the absolute cleanest cut possible.
This software is an absolute game changer and will be one of the best upgrades you make to your CNC for sign making!
In conclusion, we hope that this guide has helped you with picking out some tools and accessories to improve your sign making or help you get started in it. Signs are one of the most common things made with a CNC machine and these items are sure to help improve the quality of your signs!